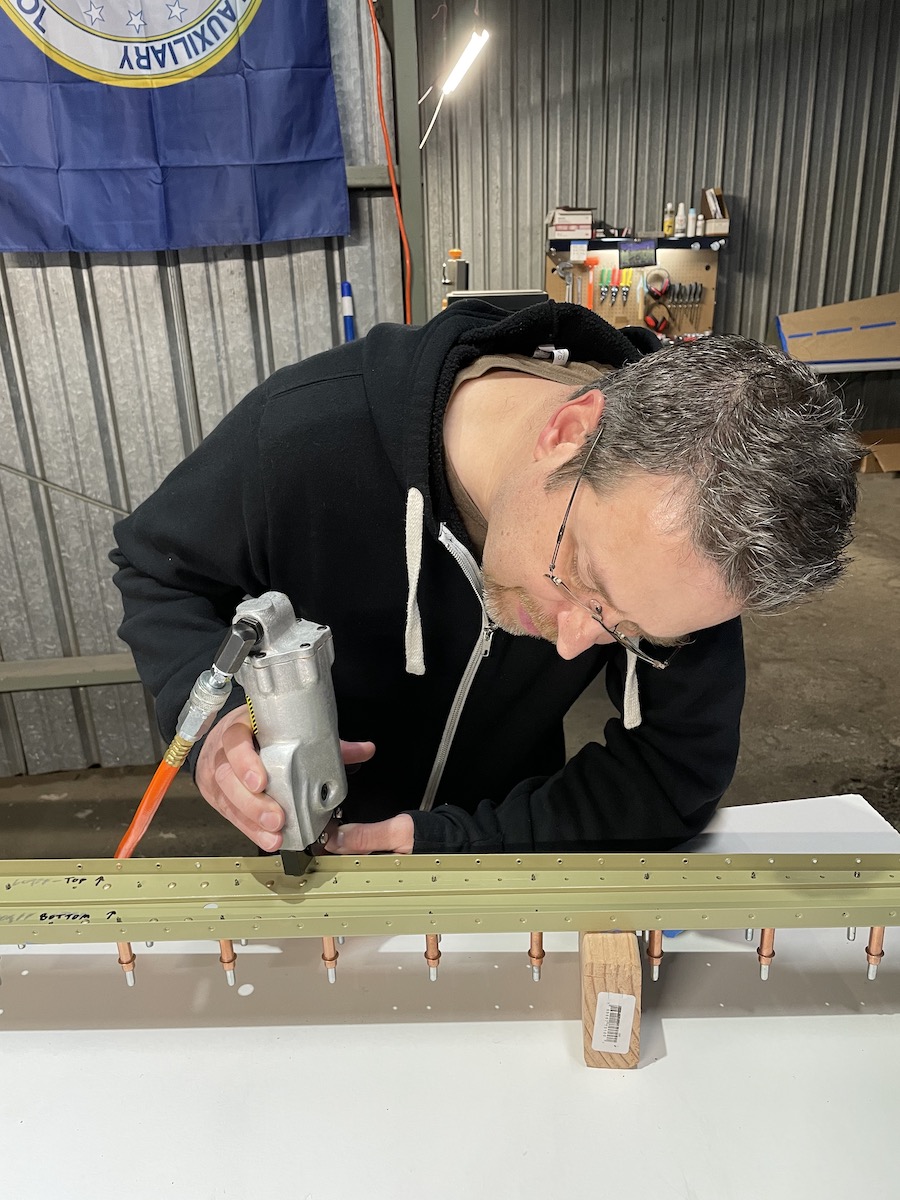
After sorting out the rear spar elevator notches, we started riveting using the NEW pneumatic riveter! It took a while to get here, but I’m really glad we spent the money for it. It made quick work of riveting the rear spare 603PPs to the reinforcing bars (609PPs).
The beauty of it is that all of the rivets look identical, and perfect!
Perfect rivets all in a row
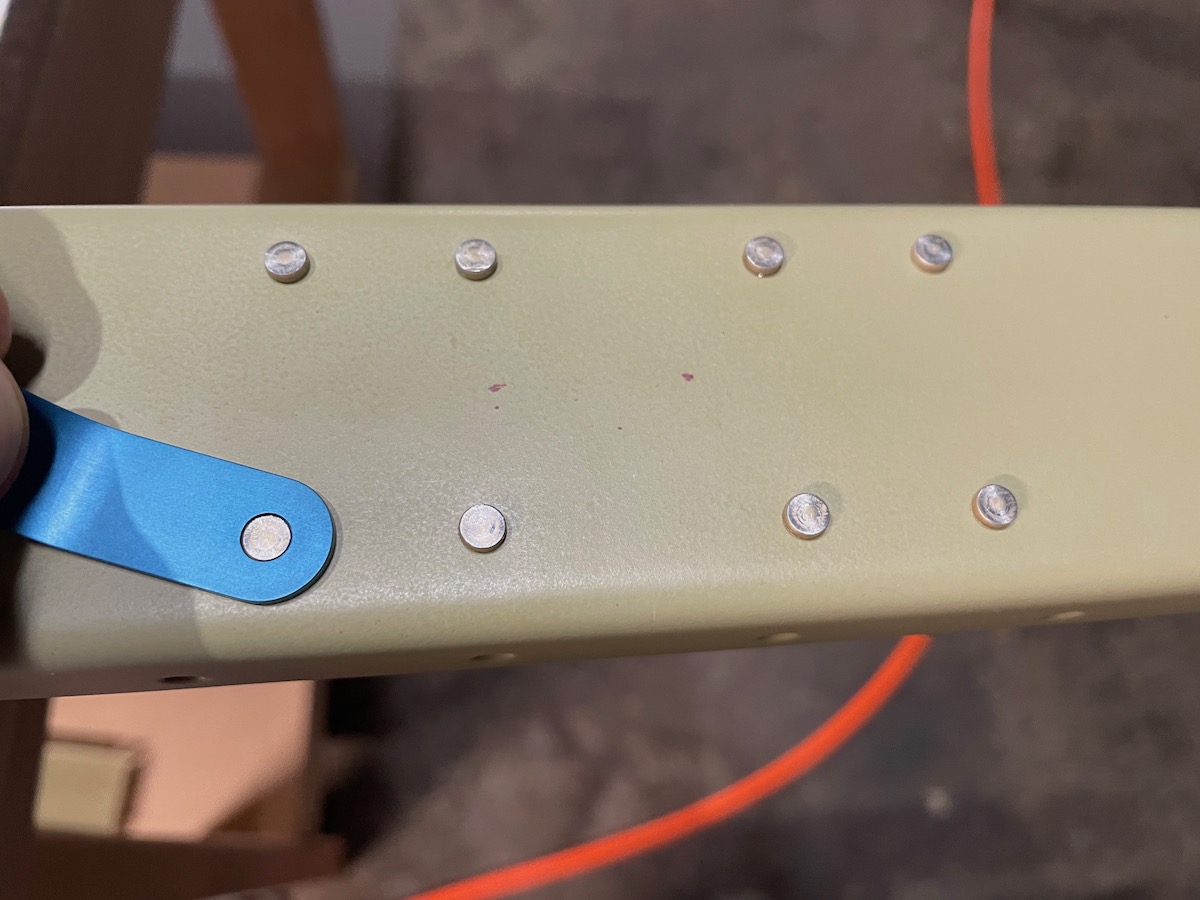
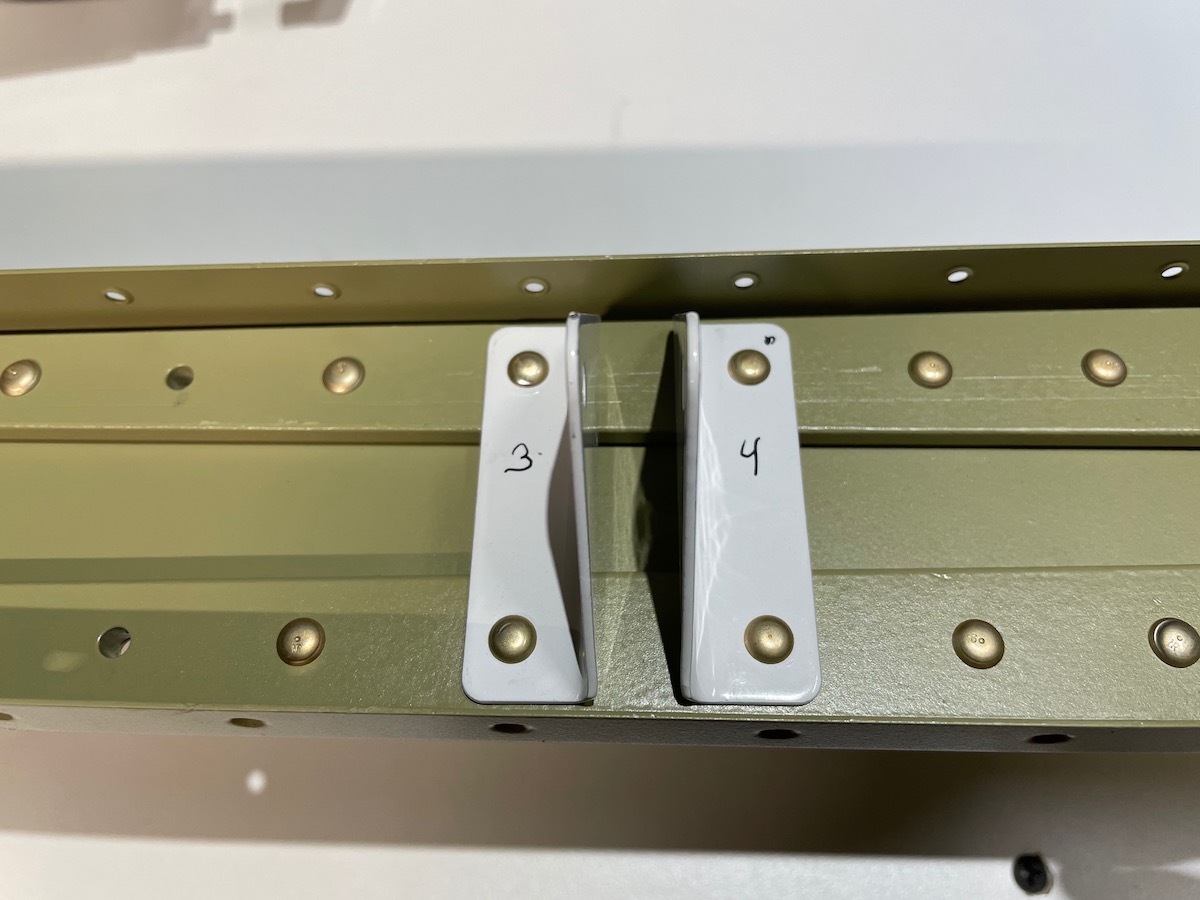
Here you can see 8 rivets attaching a hinge to the spar. I’m holding a -4 rivet gauge over the shop head to check that it’s been compressed enough, which it has.
The reinforcing bar-to-spar work amounted to 124 rivets, mostly AN470AD4-6, with a few -7s and -5s thrown in. The plans called for -5’s for the 2 outer hinge attachments, but when I went to set the first one, it looked too long. Sure enough, it didn’t set properly, which means I’ll have to drill it out.
The 1 bad rivet…too long!
I changed to -4’s for the rest and it worked out just fine (the picture with the blue gauge shows one set of the hinges with the -4’s used).
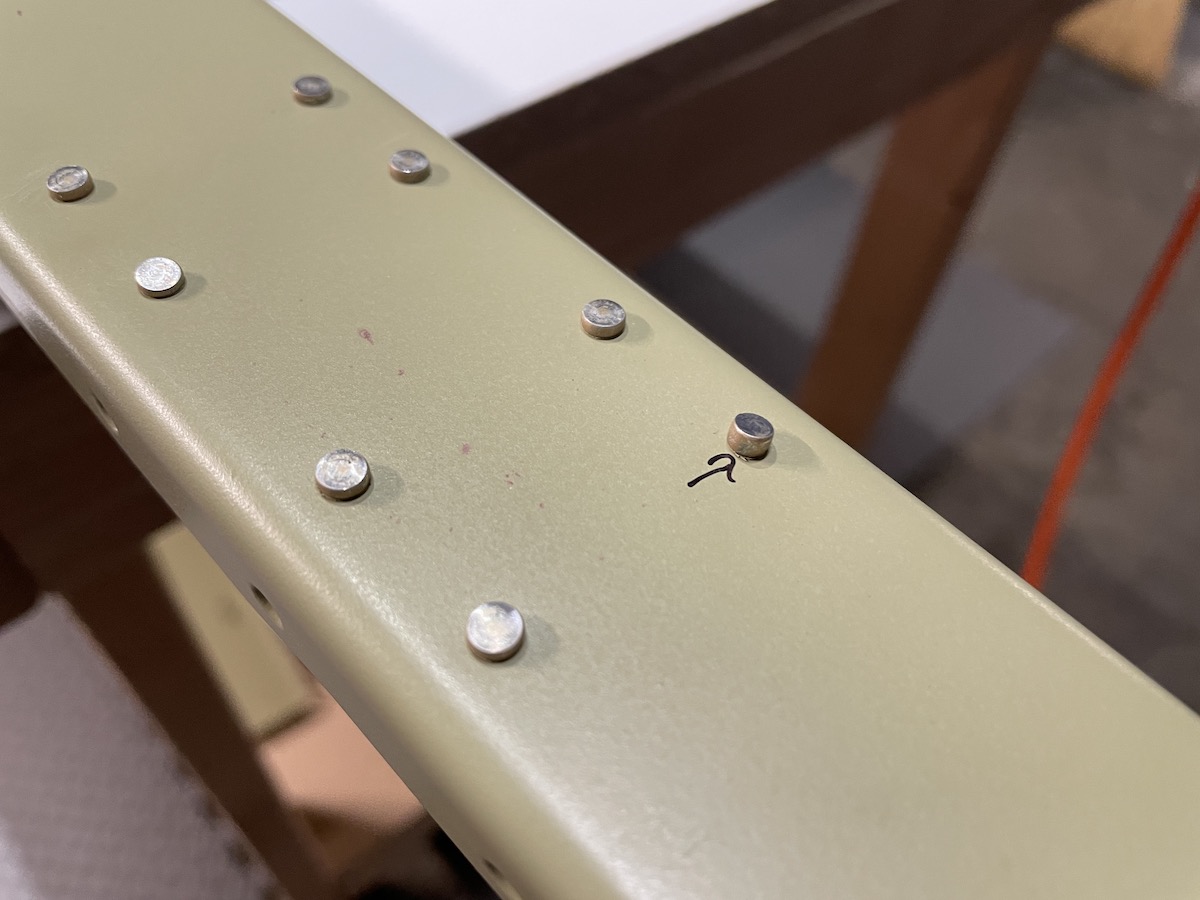
The shop heads (front side of rivets) look really cool against the spars:
I think these were AN470AD4-7 rivets here. Empty hole is for attaching a rib later.
Overall it was a great afternoon riveting. We found that the riveting part is the quick part. It’s preparing all the pieces TO be riveted that takes a bulk of the time. Next up, we’ll be riveting the front spar of the horizontal stabilizer! But first, I have to order a rivet removal tool and a small torque wrench.
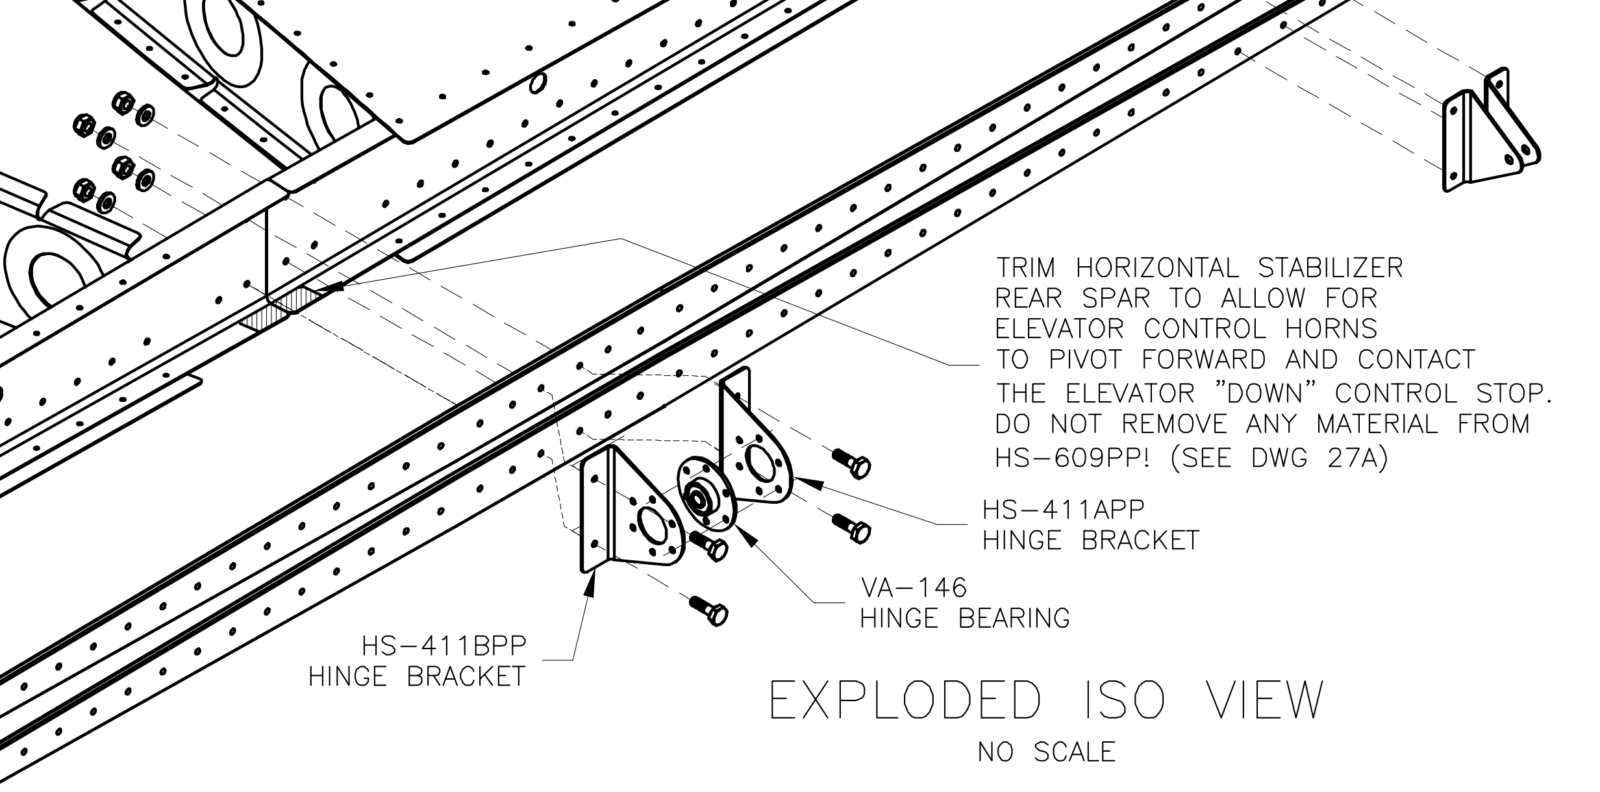
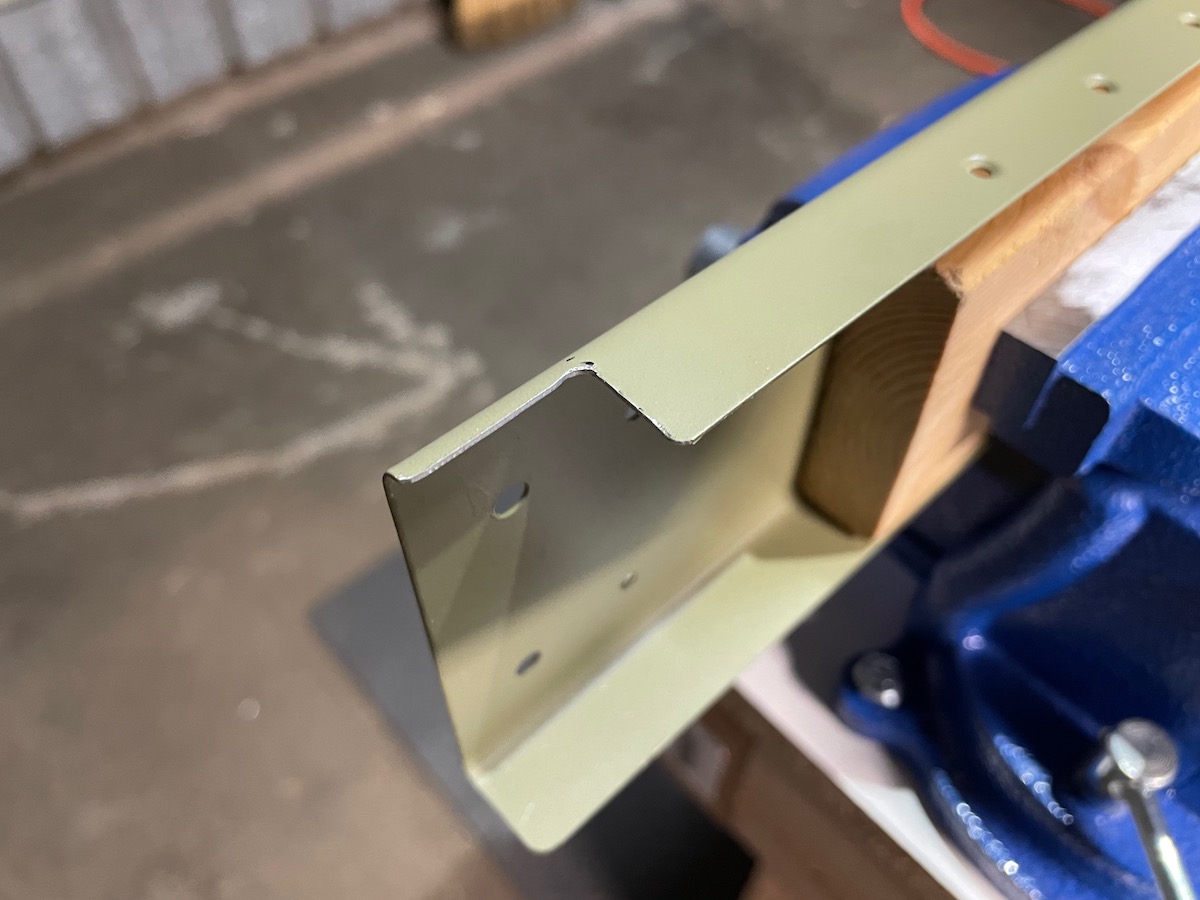
Early on in the process, I noticed this note on the plans, which calls for trimming a couple notches out of the rear spars in order to give the elevator horns enough room to move to their bottom stops. This wasn’t called out in the instructions at all, but I made a mental note to make sure I cut them out before priming.
Well, guess what happened?
I dropped Van’s an email and asked if I should do this trimming now, or if I could wait until I actually got the elevator horns (which were on back order initially) installed in a later step. They suggested that it’s best to cut the nothes now, since damaging the 609PPs in any way would be a bad thing. Since the notches come close to the bars, it was prudent to cut them out before we started riveting.
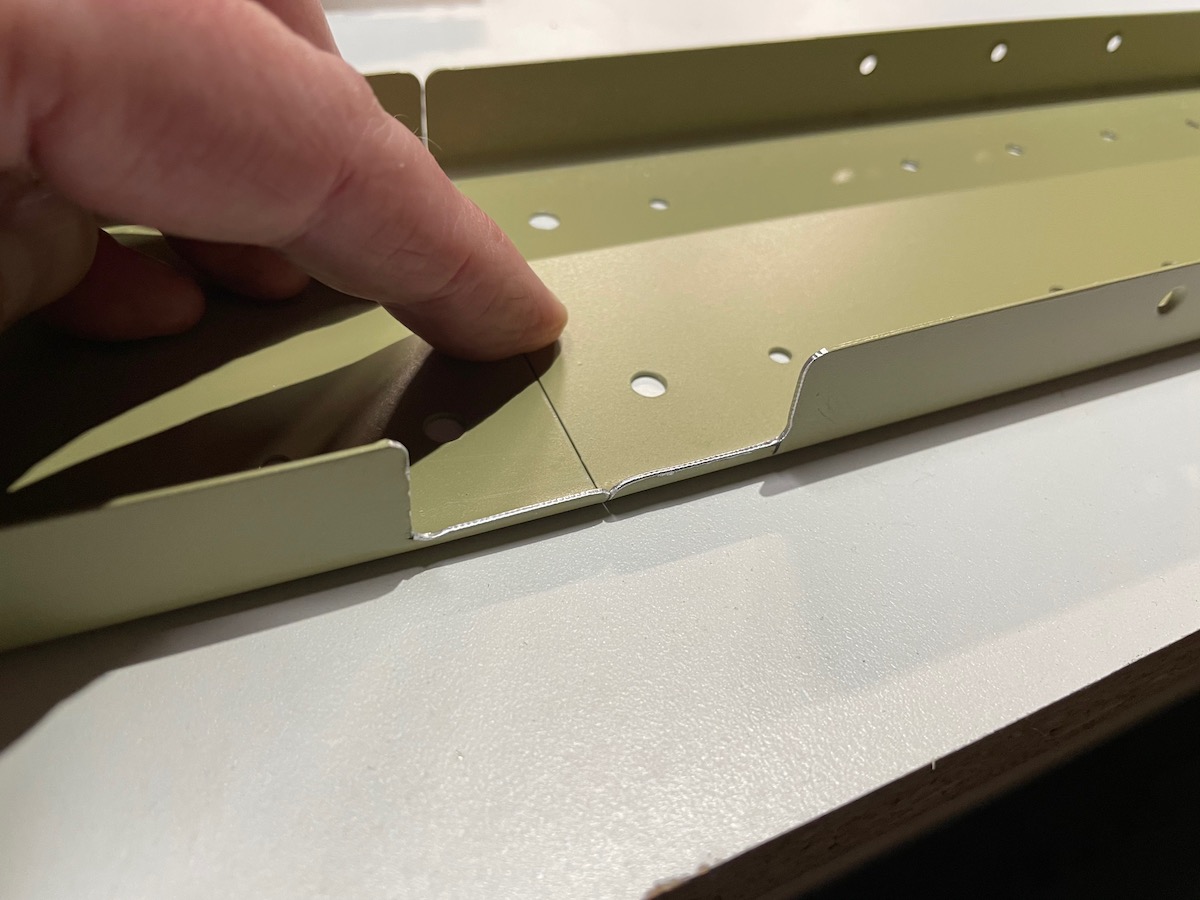
I’ve been dreading this step because the last time I had to cut a large-diameter hole I made a mess of it (didn’t practice at all with the step drill). Also, I didn’t feel I had the proper tools for cutting the notches out. So, I swung by Harbor Freight and picked up a pair of air shears after watching a number of YouTube videos about them. After a few tries, I committed to doing it.
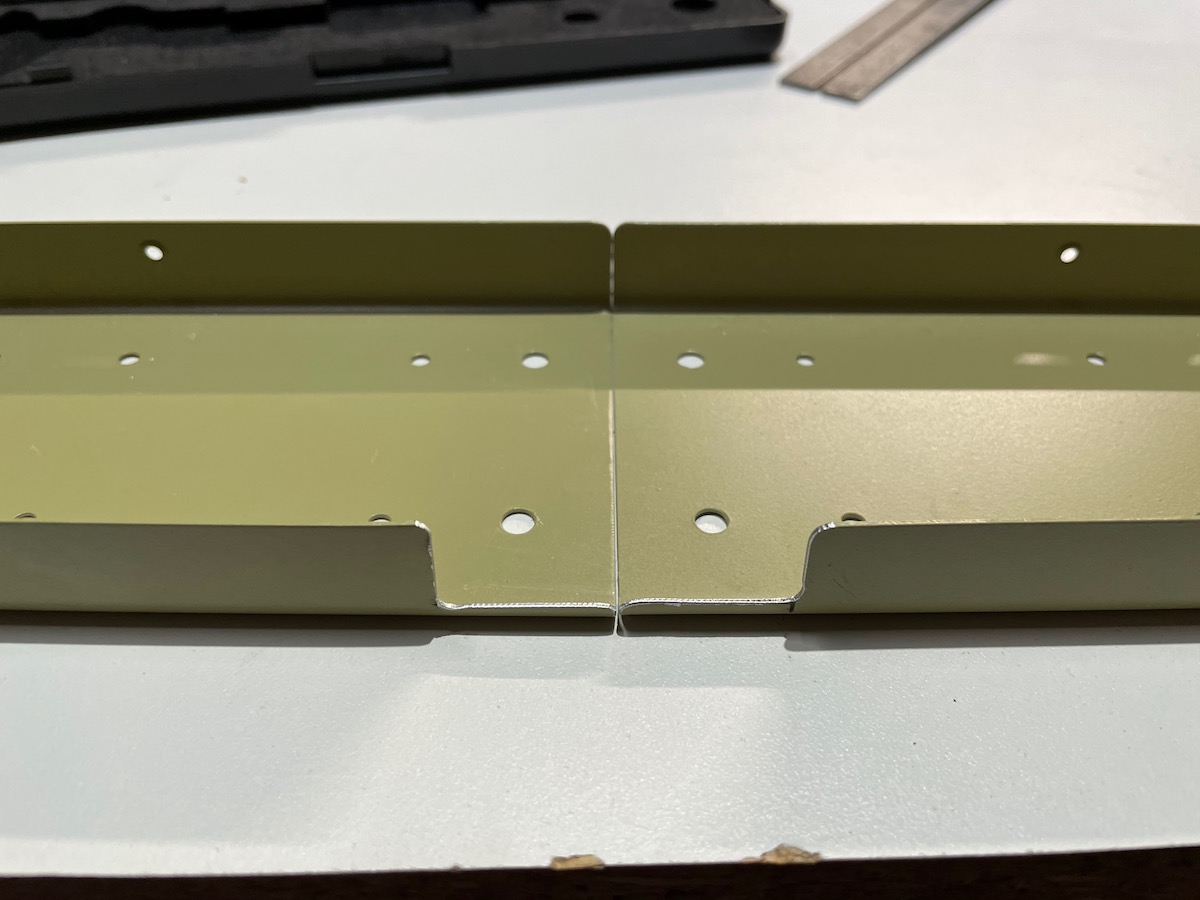
The notches, side by side
In retrospect, I should have lined the spars up first and drew the lower line across both. I marked them up separately, so they’re not even. It’s not a bad thing, just an O/C thing. 🙂
One of the other RV builders at the airport dropped by, and I showed him my conundrum. He thought maybe I was overthinking the issue, and I agree. It all ended up fine. Build on!
We finally got to a point in the project where the next step was,
“Prime, if desired…”
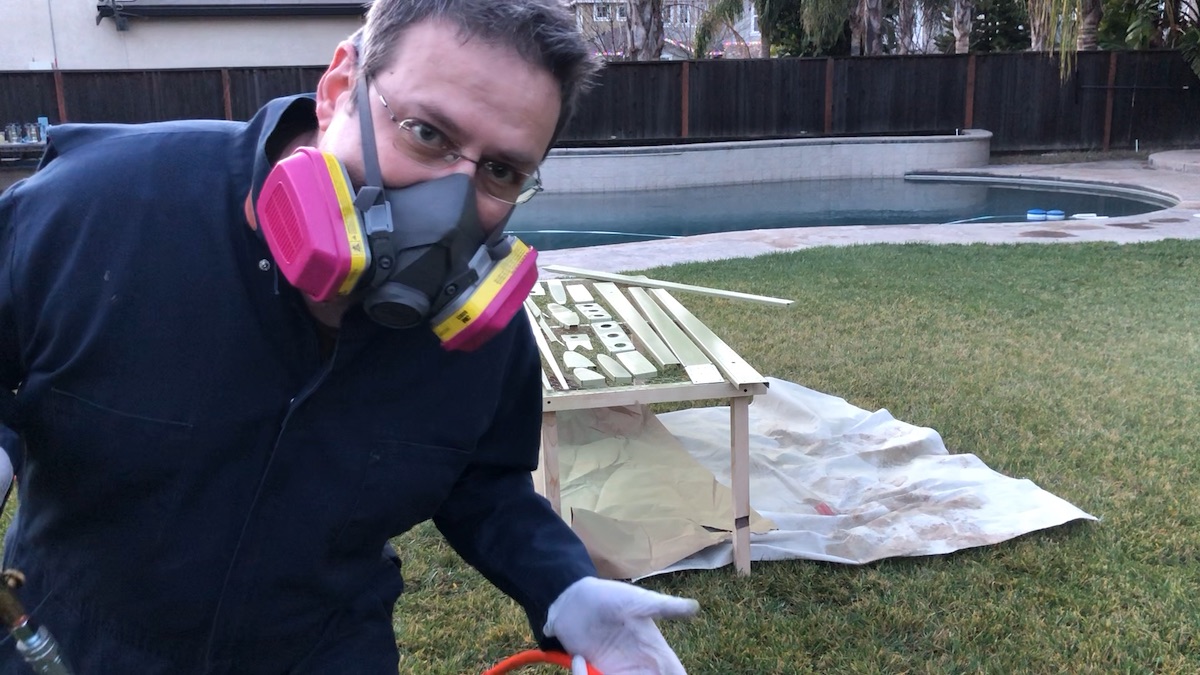
I’ve been a bit apprehensive about spray painting. First off, I’ve never done it before. Secondly, I’m using a particularly toxic primer. These two sticking points perhaps contributed to the long wait. The weather hasn’t been helping out, either. Lately the daily high temperatures have dipped below 60, which is about the lowest temp you want to have for spraying AKZO.
I had several potential approaches to priming. First off, I was hoping to be able to prime at the hangar by building a small paint booth. I asked the airport manager about it and she was fairly sure it wasn’t a good idea (overspray, flammability, etc.)
The next two possibile solutions were to build a small paint booth at home, inside the garage. To that end, I invested in a 10″ “explosion proof” fan, and 25′ of duct, which I’ll use to vent the fumes and spray from inside the paint booth. I’ve watched a number of really decent project videos on YouTube on this, and I think I’ll invest the time and effort to do so.
However, time is of the essence! I need to order the wing kit soon so that we can move smoothly from the empennage into the wings without waiting too long. Currently it’s about a 14 week lead time.
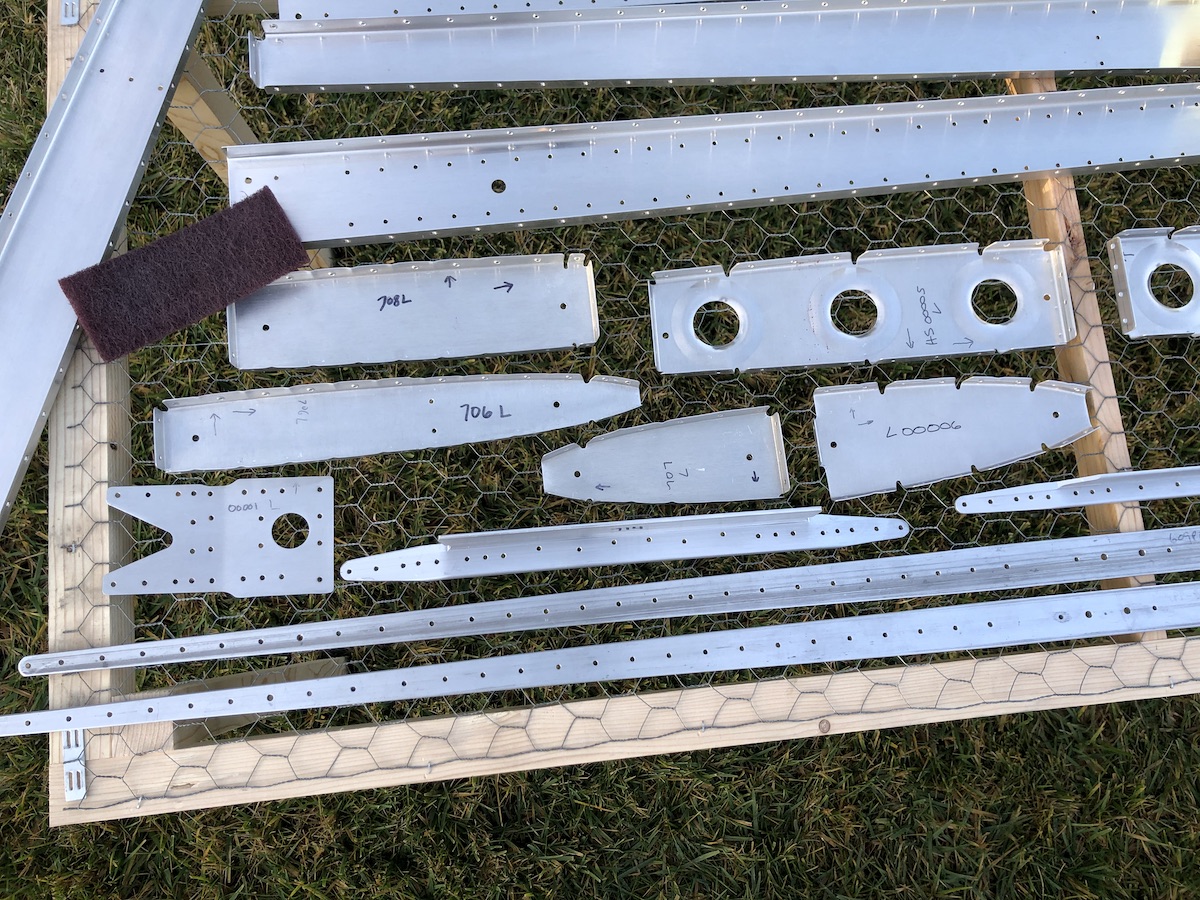
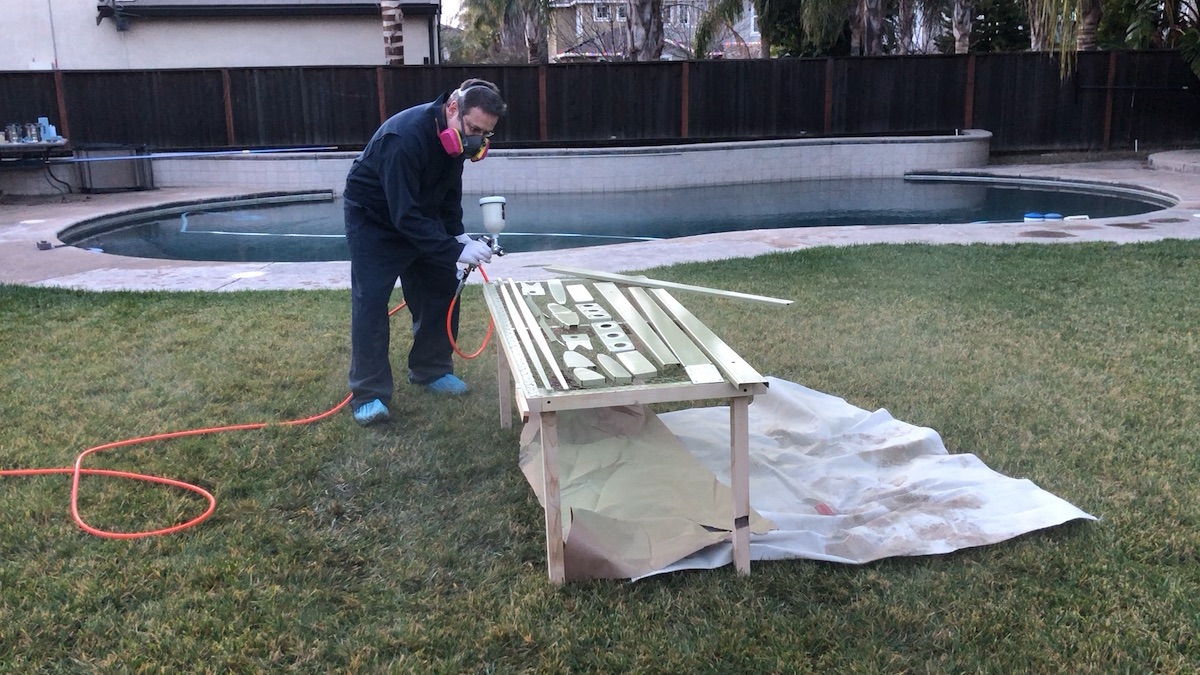
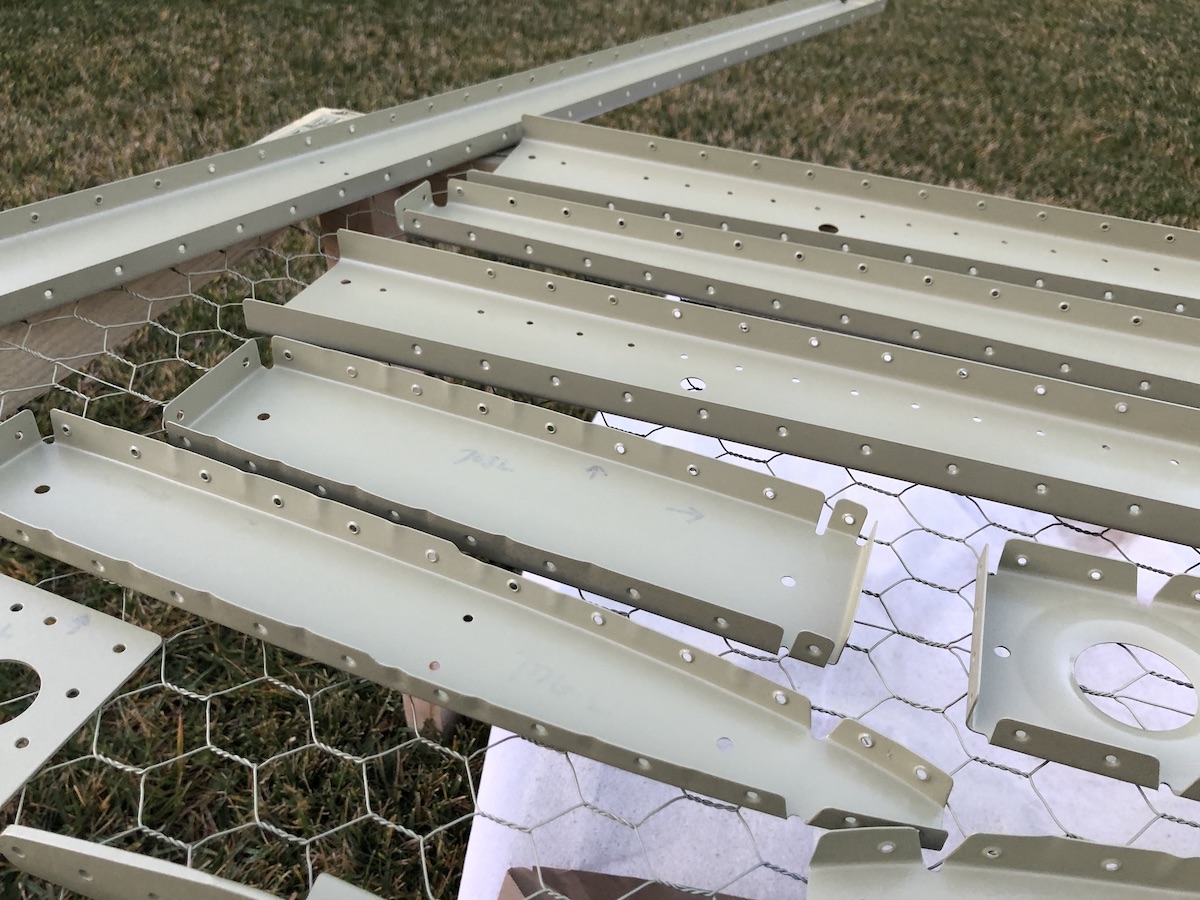
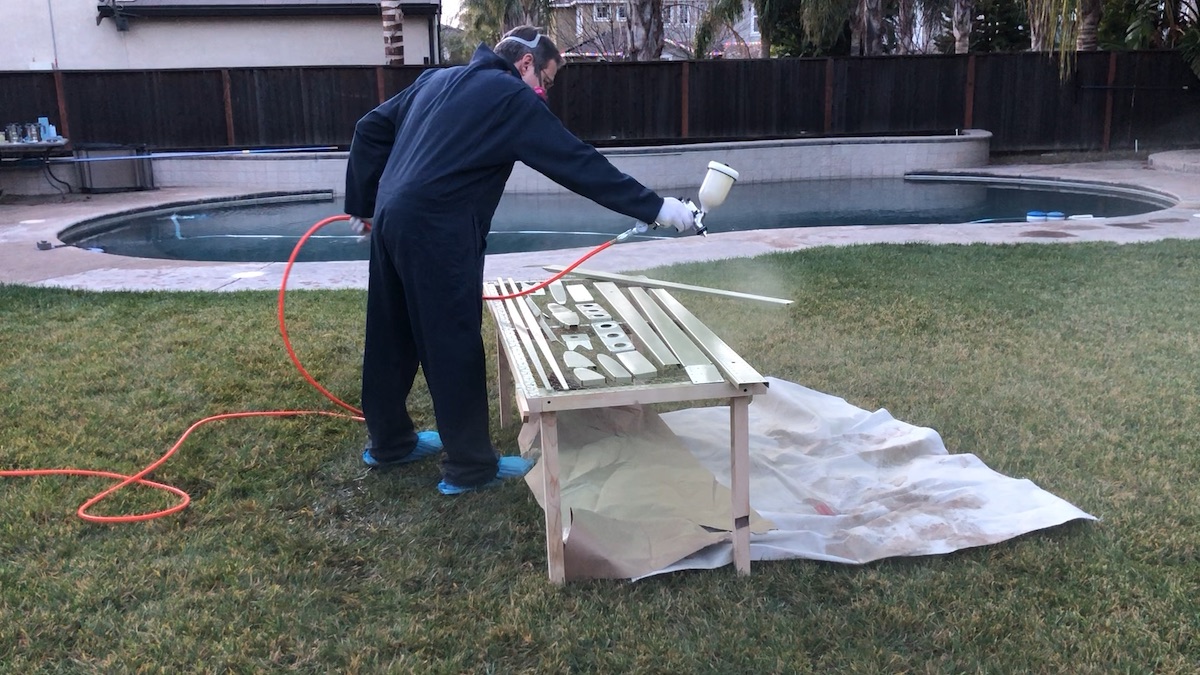
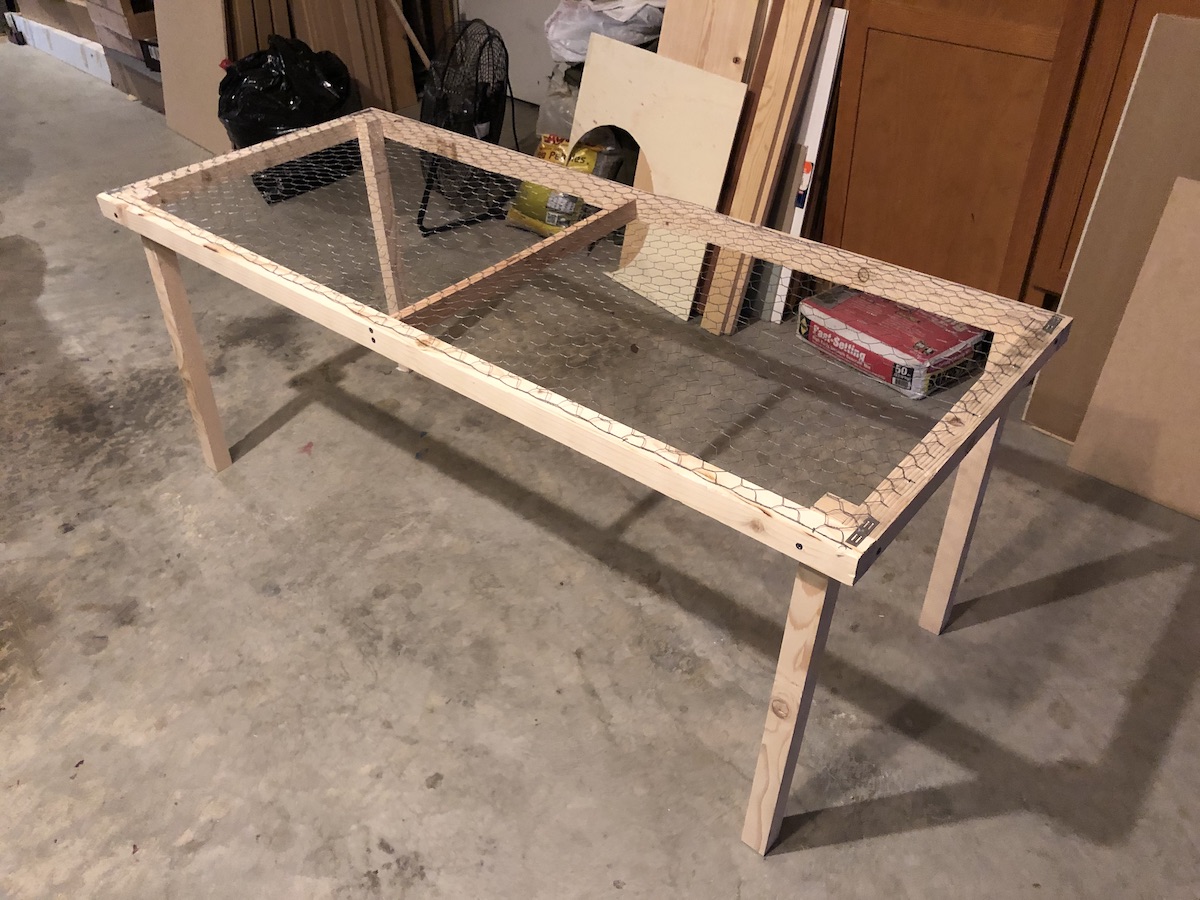
So, the last solution is to just spray these first parts outside in the backyard, where the overspray will quickly dry and float away without causing any damage. I assembled the parts and built a low table with chicken wire for a top, ordered the AKZO primer paint, a good 3M repirator, and all the other accoutrement required to do the job.
After several days of rain, today was forecast to be partly cloudy and 61°, which was right at the low point for spraying (although I’ve read that several have sprayed AKZO at 55 and even 45 degrees). So, I brought all the pieces-parts up from the hangar and started the process of preparing them
Step 1: scuff and clean
The first step is to scuff all the parts to remove the protective ALCLAD cladding in order to give the paint better adhesion. Next was to clean the surfaces from any oil/grease. I did this with denatured alcohol.
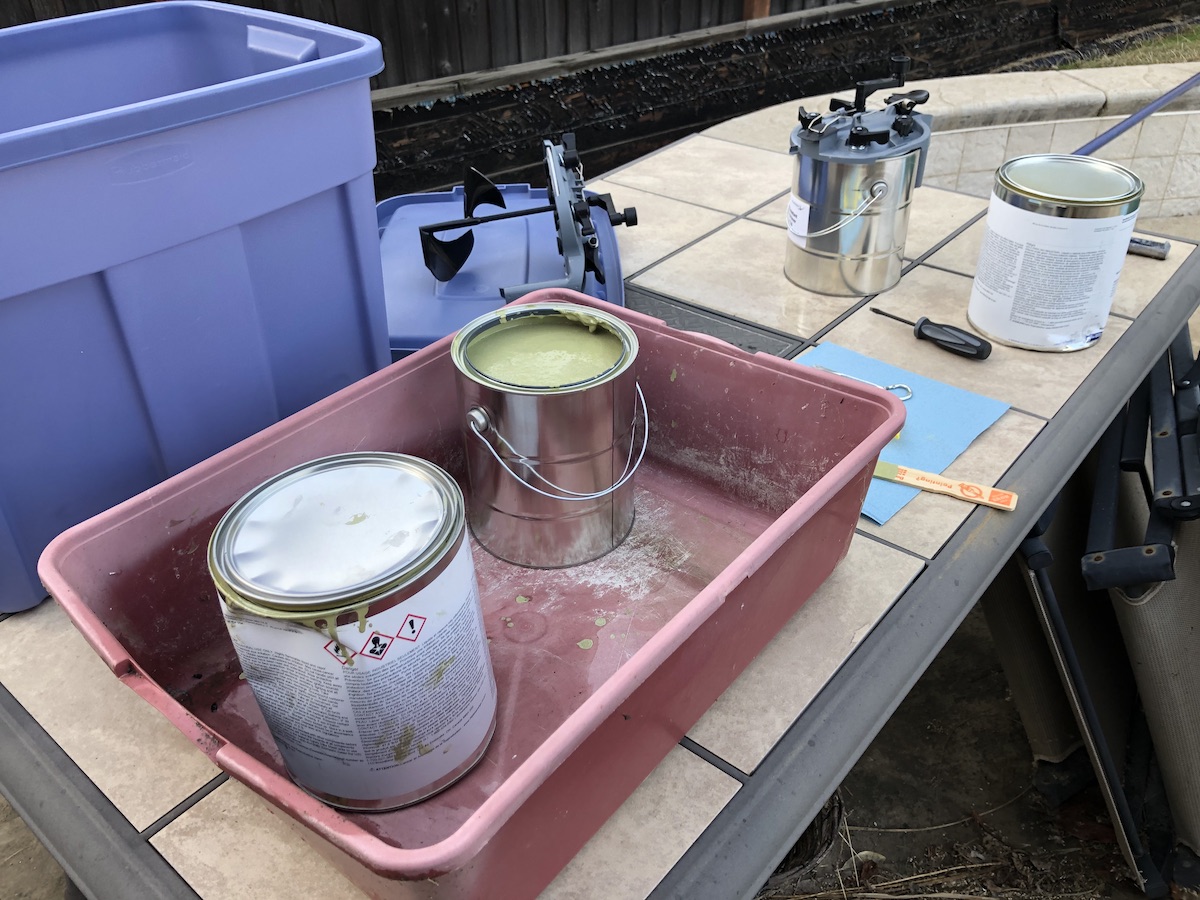
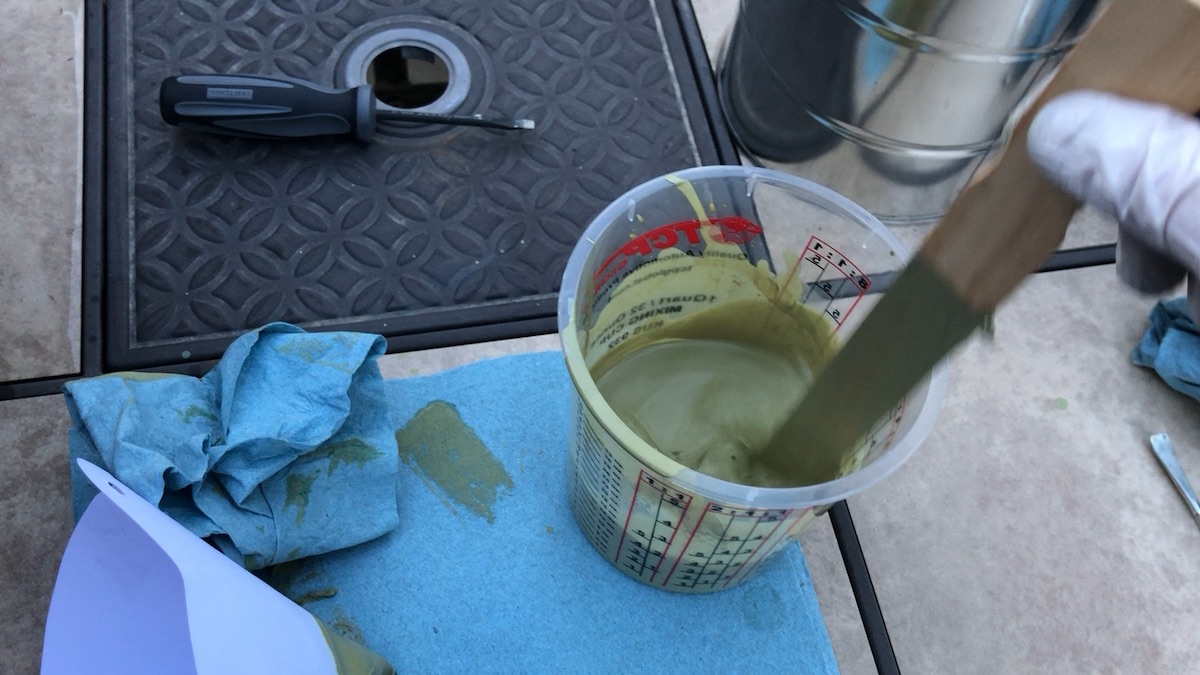
Next up was preparing the paint. Mixing the AKZO was interesting. As mentioned before, the paint came in gallon cans that were pretty bashed up when they arrived. Fearing a leak would start at some point, I went out and bought 2 empty gallon paint cans and set about transferring the paint.
The first can was the curing agent, which is a clear liquid with a slight yellow cast and a consistency of light syrup. I snapped on one of these paint can pour spouts and made the transfer easily. I then topped that can with a Rockler paint topper (with built-in paint mixer!).
The paint itself was a different story. The solids had settled and coalesced at the bottom of the original can. I started by first shaking the can a bit to mix it, but gently since the can was damaged. After pouring half of it I saw the solids had gelled at the bottom. THICK solids! I decided to pour back some of the liquid and try shaking some more, then stirring with a paint stick. Still, some of the goop was like silly putty! I finally got most all the goop reincorporated with the liquid and scraped the rest into the new can. After inserting the Rockler top I was able to stir it easily.
Transferring paint to new can. Rockler top is behind
After transferring the paint to their new cans, I mixed the Component A (paint) for a couple minutes, then poured out equal parts of Comp A and B into a mixing cup and stirred it up good.
mix mix mix!
Next, the paint was pouted through a filter cone into the spray gun’s hopper, and off I went!
The first side done
I mixed another hopper of paint while the first side dried to tack (15 minutes). Then I carefully flipped everything over and sprayed the second side. Both times I lucked out and mixed just enough to finish each side!
Gotta love the booties
Overall, I’m happy with the results. I did forget a couple things while spraying, like giving the first batch of paint 30 minutes to be ready after mixing it. I also had a bit of trouble getting the proper fan pattern set, but after twiddling the knobs a bit it looked okay. I sprayed at 40psi, but probably could have turned the air down a bit more. Cleanup went okay, but I was pouring from a half-gallon can of solvent, and it got everywhere. There is a special solvent sprayer I need to pick up that makes it easier.
Unfortunately, I got started a bit late, as I had to run out to ACE hardware to pick up a connector for the spray gun to connect to the air hose. By the time I had finished spraying the second side, it was getting dark. I ended up cleaning up and bringing everything in well after sunset. All the parts were shuttled into the garage where they are currently drying.
So, I finally did it, and it wasn’t that bad. Tomorrow I spray the skins, then we can get back to work with riveting! Build on!
It’s been kind of slow these past couple weeks. The weather is getting cooler, and weather is starting to become an issue. This past weekend I had planned to prime the parts we’ve been working on, but it turned out rainy and cool enough to dip below the minimum temperature for the AKZO paint.
I did, however, manage to complete a simple paint table, which I plan to use in the back yard to spray the parts we need to prime before we can start riveting the horizontal stabilzer. This one it temporary, and I’ll attach a 5′ x 5′ cloth paint tarp underneath so that it creates a trap for the paint overspray.
I’m still designing the paint booth that I’ll set up inside the garage so that I can spray during the winter, where I can keep it warm enough to spray. I have a 10″ exhaust fan and 25′ duct to take away the vapors and exhaust them outside.
Weather is improving, and I’m hopeful that during this week I can take some time to get some priming done.
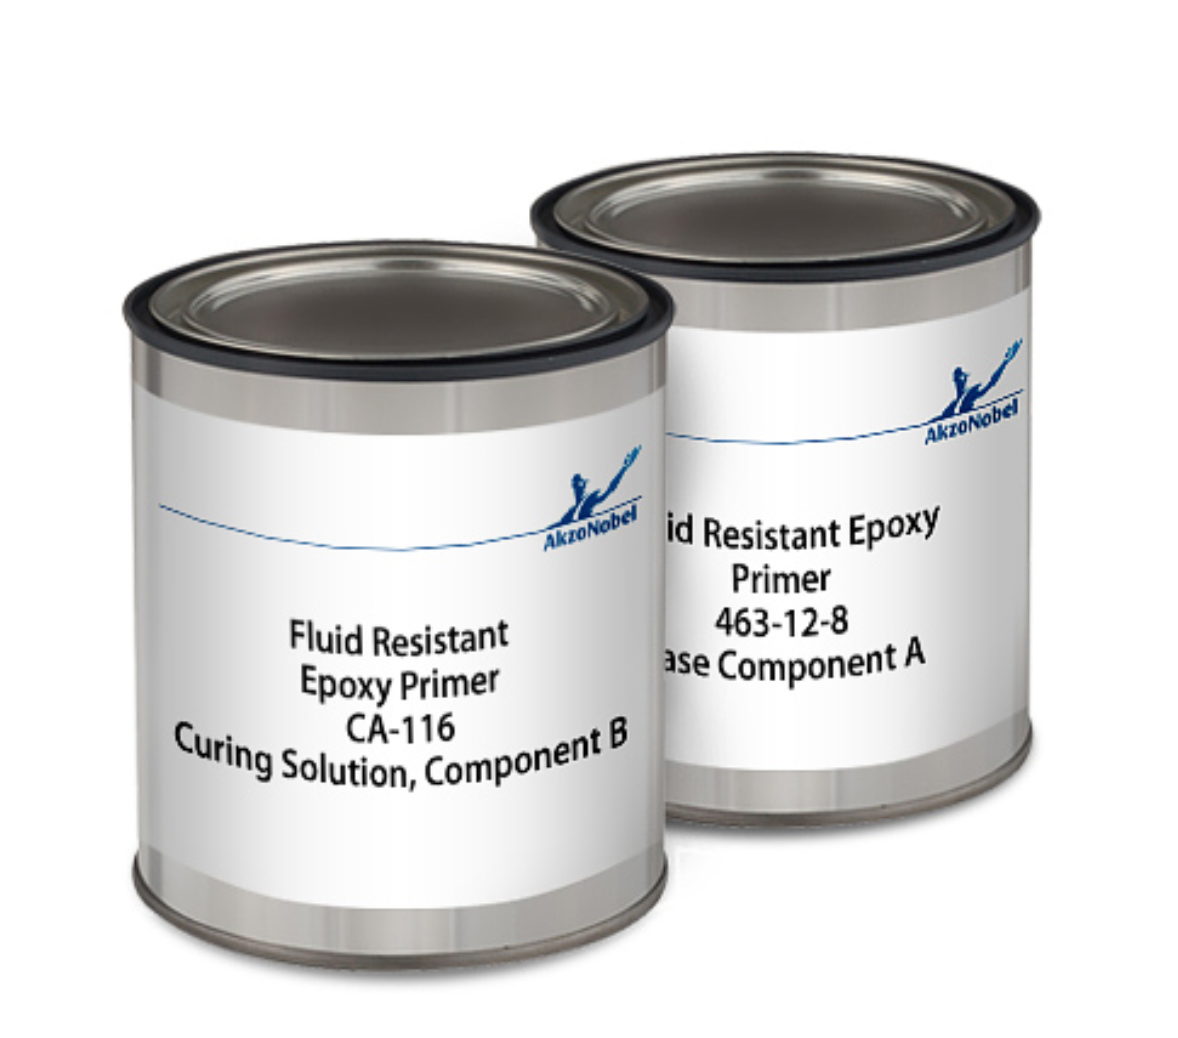
I ordered the AKZO military-green primer for the internal parts, which I intend on spraying on. I’ve been considering different options, but the AKZO primer has won out. Fortunately there are a lot of YouTube videos out there that not only go over how to apply it, but how to set up and use a paint gun…another skill I’ve yet to develop!
For the first run I think I’ll just spray out in the backyard, on a makeshift paint rack. I do have all the parts I’ll need to build a paint booth, but in order to get started quickly I’ll do what most others have done…paint outside…for now.
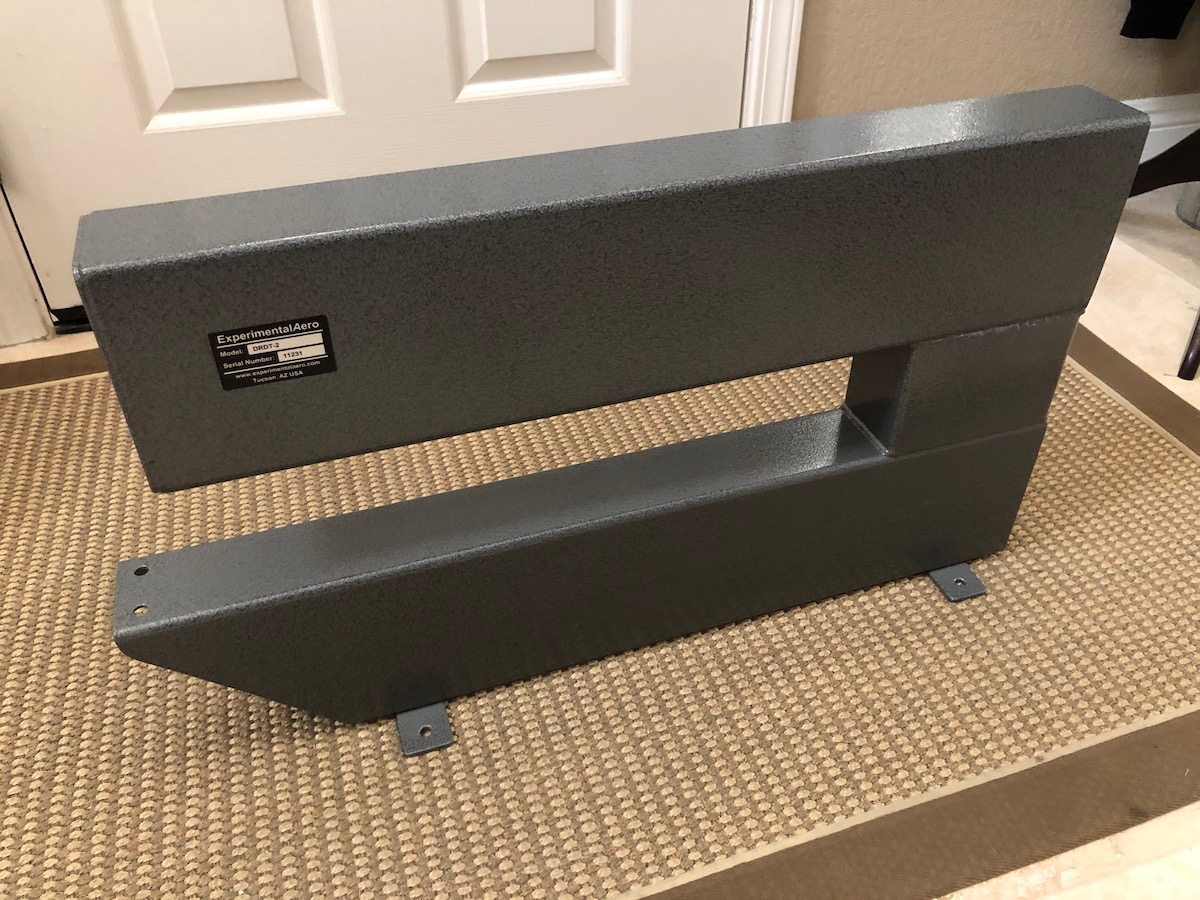
The new DRDT-2 dimpler TANK (I’ve yet to put it together)!
So last weekend we started dimpling the horizontal stabilizer skins with the Whack-a-Mole dimpler (C-frame dimpler). To be honest, I wasn’t happy with the results. To use it, you place the hole in the skin atop the male dimple die, then whack on a long pin, which then drives the female part of the die against the skin to make the dimple.
I discovered 2 things right away… unless you use the exact force each time you strike the pin, your dimples aren’t consistent. I also found it hard to tell if the dimple was set correctly until lifting the skin off the tool and checking it. As it turned out, the great majority of the dimples are under-done, which means I’ll have to go back and whack on them so more. The problem with that is, the more you deform a piece of metal, the weaker it gets. I found I had to strike the pin twice for each dimple near the end. No bueno.
Back when we first started the project, and when I was considering all the tools we had to buy, I had to decide between the C-frame and the DRDT-2. At the time the price of the DRDT-2 seemed excessive for what I needed it to do..produce dimples. Now I know that I not only need a tool that accomplishes this, but I need one that does it consistently, and with the least amount of potential damage to the skin (I have already had the skin jump off the small pin once as I was striking the pin, making a divot).
Anyhow, I bit the bullet and decided to invest in the DRDT-2 anyhow. So now I have 2 deep-reach dimplers…along with 3 or 4 other dimpling devices. For now I’ll keep both, but after re-reviewing the DRDT-2 I’m pretty sure it’s going to be the go-to dimpling device.
The difference between them is that the DRDT-2 is a compression dimpler, just like our hand squeezer, except it’s a giant, honking tank of a device (weights over 30#). One thing I like about the hand squeezer is that it was very easy to produce consistent results. The downside is that it’s tiring to use, requiring both hands and a good amount of force. The DRDT-2 has just one handle, and sits on the table.
Anyhow, so it now joins the other dimplers in the tool shed. I’m excited about it, actually.
Oh, on another note… I also bought a pneumatic squeezer/riveter…so that makes 5 or 6 suqeezers!
We brought home all the pieces of the horizontal stabilizer that needed to be dimpled so that we could do it from the comfort of the couch! Dimpling is the process of forming dimples in the metal so that they can accept a flush rivet. The fact that it’s a “flush” rivet means it sits flush against the skin, and so it needs a dimple to nestle into.
Not only do you have to dimple the skins, but anything underneath the skin that will end up riveted together.
There are a lot of different ways to dimple using a variety of tools. The most convenient and quickest is to use a hand squeezer, which I’ve shown in past posts. That’s the tool we brought back to do the dimpling for these pieces.
Here’s a short video clip of me dimpling one of the hstab ribs. I love the crinkling sound the metal makes as the dimple is formed. It’s relaxing!
Making the crinkly
All those parts in the background will require dimpling. We’ll do the skins at the hangar, since we need to use the c-clamp dimpler for those.
Witness rings around dimple mean they’re done enough.
I’ll be borrowing a pneumatic dimpler from a friend to make this process a little faster and less wearing on the forearm muscles. I’d buy one, but I can’t justify the $800-900 they cost. Besides, you have to be around the compressor, which is not only loud, but a pain in the butt to haul back and forth from the hangar should we want to continue dimpling from the couch.
It’s getting close to priming! We’re about done with the first part of the horizontal stabilizer, and the instructions are calling for priming. Exciting! Well, in a gut-wrenching, nervous kinda way.
So, I’ve never spray painted anything before, unless you consider using rattle cans (which I don’t consider real spray painting). The prospect of priming the plane the right way means getting the right gear. In the case of priming airplanes, that equates to a spray gun..and paint. Fortunately, we’ll be painting stuff that nobody will see, so that makes it a bit easier to deal with.
But before we start, we have to select what kind of paint we want to use. There are a lot of options for brand, type and color. Some are toxic, while others are super eco friendly. They all are astronomically expensive (at least I think so).
Reading through the Vans Air Force web site only makes my head spin. There are as many different recommendations as there are people making them. So, I decided I’ll come up with specs I think are the best and go from there.
The top choices I ended up with are AKZO and Stewart’s. Stewarts is a water-based paint, which is great for the environment. It can be a little finicky, but can produce an easy, nice finish. Just don’t ever spill any kind of solvent on it.
AKZO is the Cadillac of aircraft paint. It’s a lacquer paint, super hard and resists pretty much any kind of solvent (fuel, alcohol, MEK, etc). Application is easy…mix 1-to-1 with it’s activator and spray it. The downside is it’s pretty toxic.
Mmmm! lacquer goodness!
Denny has used this on his RV-8 (pictured above), and man…that finish is absolutely gorgeous! However, to spray it safely I need to set up a ventilated paint booth. That’s a no-go at the airport, so I’m going to have to construct something at home that I can put together and take apart as needed, and that has plenty of ventilation for overspray and vapor protection. I’ve watched a number of videos on this, and have a good idea of what I want to do.
The booth will have a solid frame back side with a ventilation box covered with a couple diffusion panels, with filters behind them. To that I need to attach a fan that’ll be strong enough to draw out the vapors, and a way to get them away from the booth and outside.
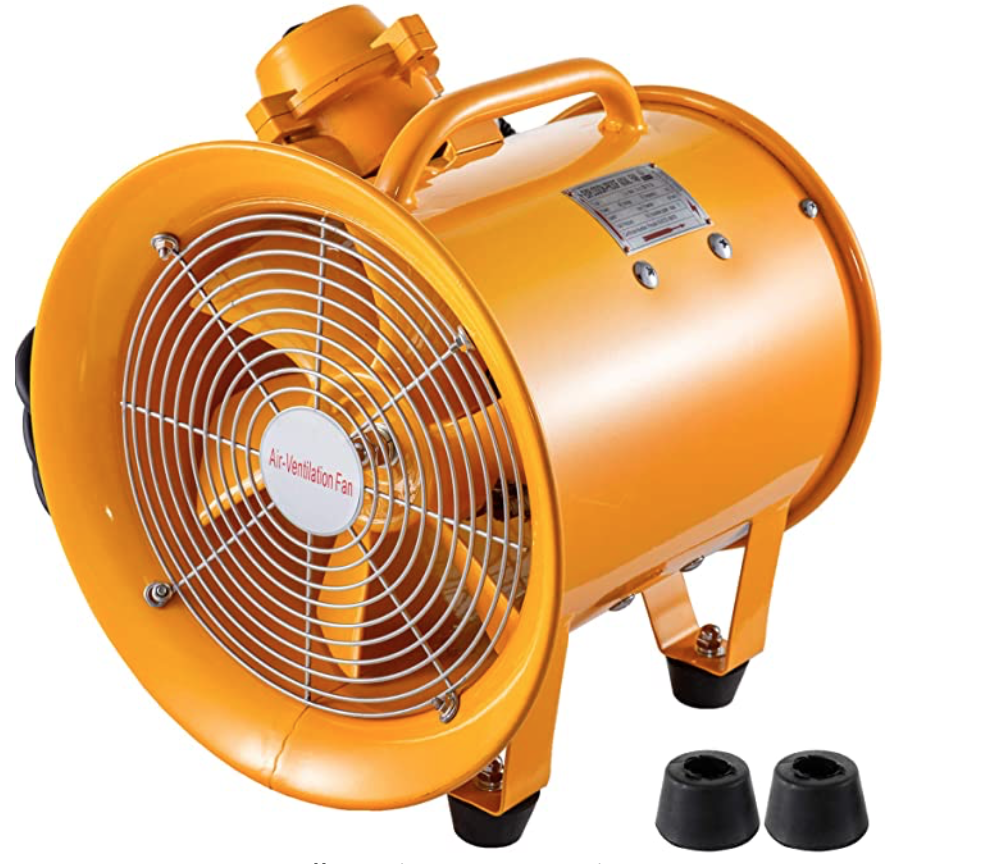
I found a great little 10″ explosion-proof utility blower and a 25-foot flexible PVC hosing duct on Amazon. I’ll use it to pull air through the ventilation panels and out under the garage door.
The little blower that could
The rest of the booth will be made of sched 40 PVC pipe and covered with clear plastic paint dropcloth. I’ll hang the parts on a rod across the front of the diffuser panels and spray them that way. The diffuser will catch most of the overspray, and the blower will vent the vapors outside. Of course, I’ll still need to be wearing a vapor mask while I’m working inside the booth. I think this arrangement should work okay.
I ordered the paint today, and it’ll be here in 2 weeks. So now I have to hustle to build at least a temporary spray booth so that I can get these first parts done and we can get on to riveting!
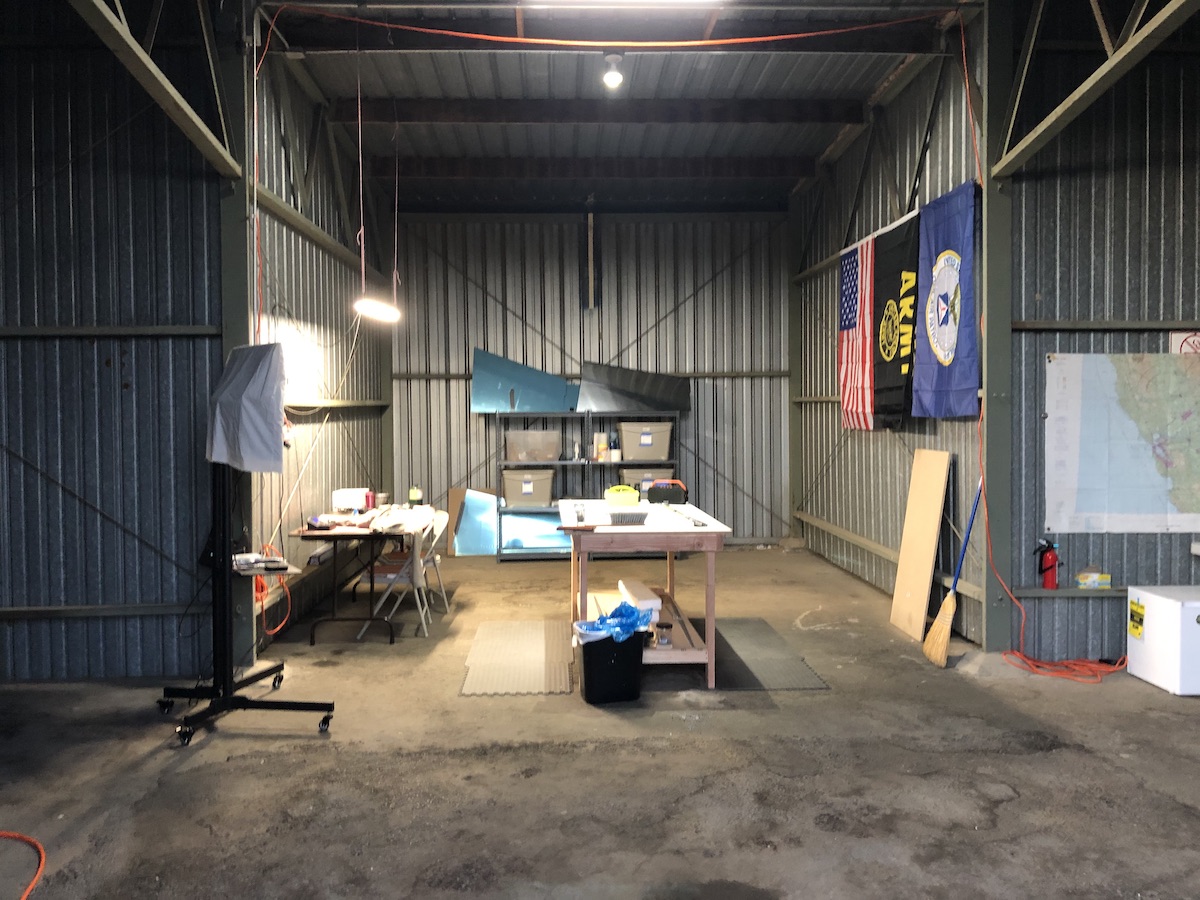
It’s a chilly Thanksgiving eve, at least by California standards. Our hangar is constructed of single-wall metal panels, with lots of seams, gaps and holes. It’s basically a sieve. Since we plan on working through winter, in order to keep on schedule, that means we need to some way to heat the place. All we have now is a little portable propane heater (Mr. Heater Buddy!). Sadly, it’s not anywhere near what we need to heat a 800+ sq ft metal box.
After asking around, it looks like kerosene heaters are the way to go. You can use it safely indoors, unlike propane. Given, our hangar really can’t be described as “indoor”, I am a bit concerned about carbon monoxide. Nobody thinks that’ll be an issue in our leaky box. One potentially exciting convenience is that the airport sells Jet-a fuel, which is kerosene…sorta.
I opted to buy a 23k BTU kerosene wick heater, which purportedly provides enough radiant heat to cover 1200 sq ft. I’m a little skeptical, but this one had some good reviews…
The new heater
Apparently, folks at the airport have used Jet-A successfully in kerosene heaters like this. However, after doing a little research, Jet-A might have too much other “stuff” in it. K-1 kerosene is very pure, and you pay for it ($10/gallon). Jet-A usually has an additive called Prist, or has other minerals not conducive to clean burning. I do, however, like the idea of the hangar smelling like a jet engine. 🙂
Now that we’ve disassembled the horizontal stab parts, it’s time to prep them for riveting! WOOHOO! Unfortunately, this is one of the most tedious and time consuming parts of the project…and one that will be repeated a LOT… 1) deburr, 2) dimple, 3) clean edges, 4) prime.
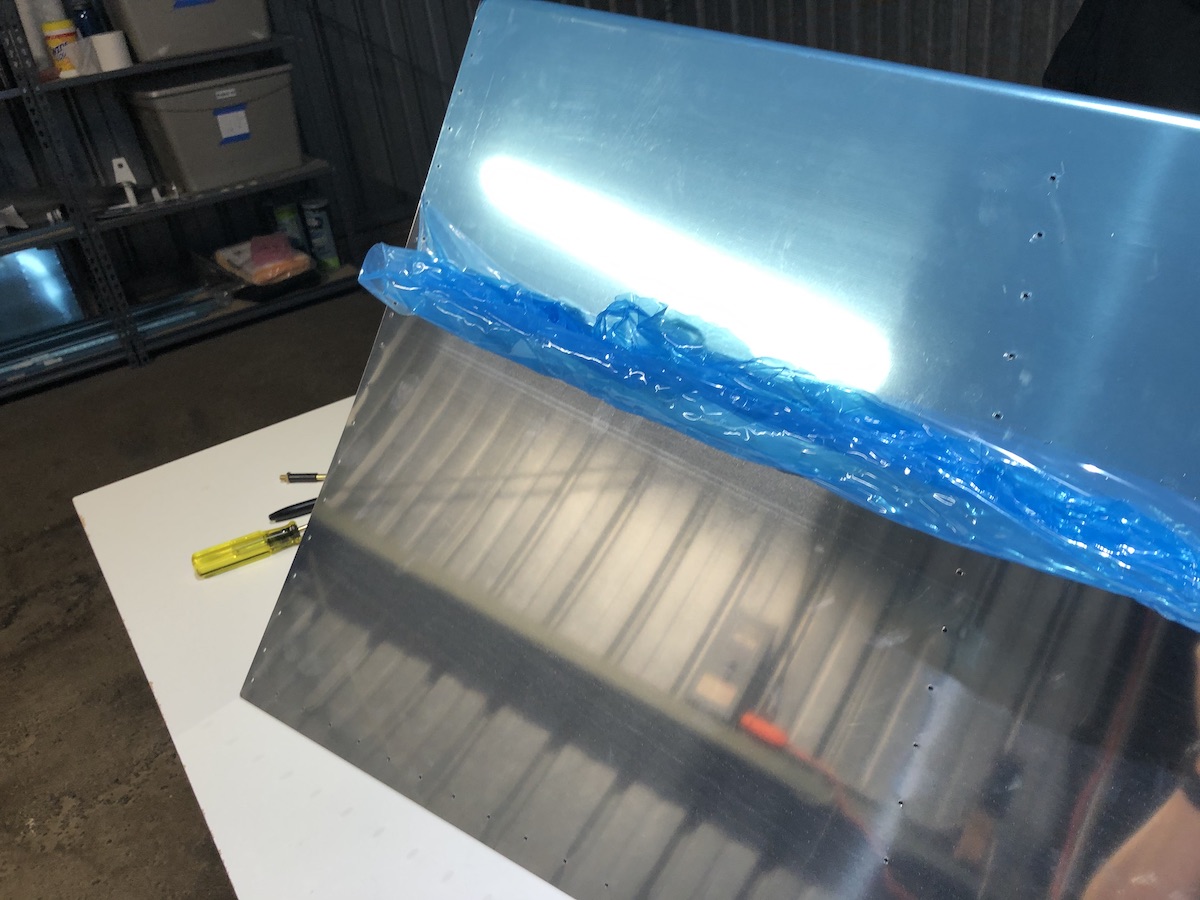
Today we started the first part…deburring the myriad holes we match-drilled last time. For the most part, the small parts were pretty easy. The larger the part, the more work. At the top was the skin itself. We tackled that using teamwork! Just like in our gazebo project, the parts are all covered by a thin blue vinyl covering, for scratch protection. It’s stuck pretty firmly to the parts, and especially on the skins it’s a lot of work to remove. We had to do the same for the large aluminum panels that made up the gazebo roof. I thought we were done with that forever. 🙂
Noooo! Not more VINYL!!!
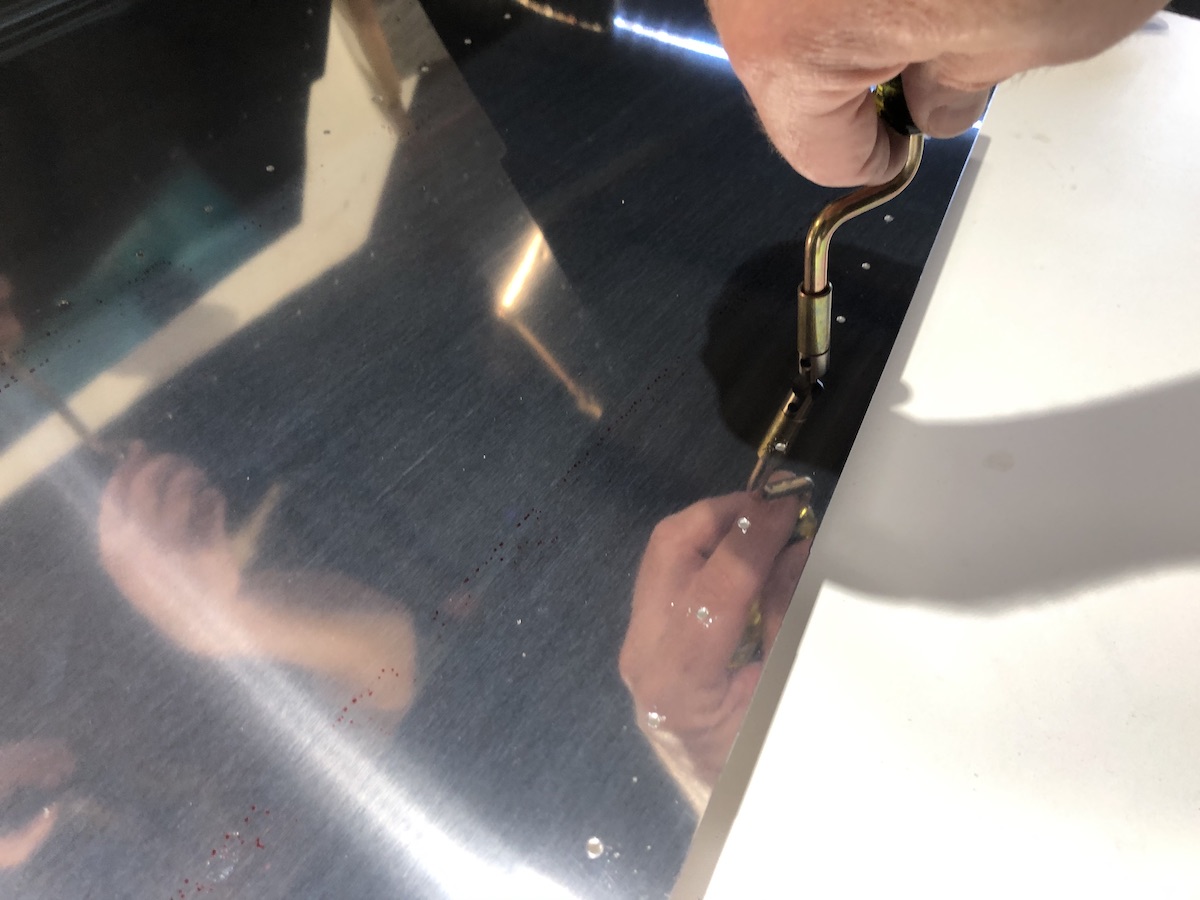
Once we got that removed (from both sides), we started working on deburring. I bought a second deburring tool so that we could work concurrently. The operation is simple. You take the point of the tool, which is basically a countersink bit attached to a metal shaft with 2 bends in it, and a handle. You can swivel the tool around, turning the bit and digging out a little bit of metal at the top of the hole. this introduces a very slight countersink to it, removing any burrs and making it smooth.
We had to do this on all the holes in the parts…on both sides (although theoretically the holes on the side where the manufacturing tool punches the holes through are pretty much deburred already). This took a couple of hours to complete, but we had Coraline playing on the TV and that helped the time pass.
After we finished the hole deburring came dimpling, but it was getting late in the afternoon and I had a CAP meeting to prepare for. So, we grabbed all the parts (save the skins) and brought them back home, along with the hand squeezer and a set of 3/32″ dimpling dies. I figured we can dimple as we sit comfortably in the living room watching TV. 🙂
As far as dimpling goes, what you’re basically doing is, well, making a dimple in the skin that will accomodate a flush rivet so that it sits flush against the skin. Not only does the skin need dimpling, but the structure underneath the skin, so that all pieces have dimples that nestle into each other.
Dimpling can be done with a number of different tools. Mainly we’ll use our hand squeezer for all the holes along edges and inward about 3″ (because that’s the depth of the frame).
Using the hand squeezer
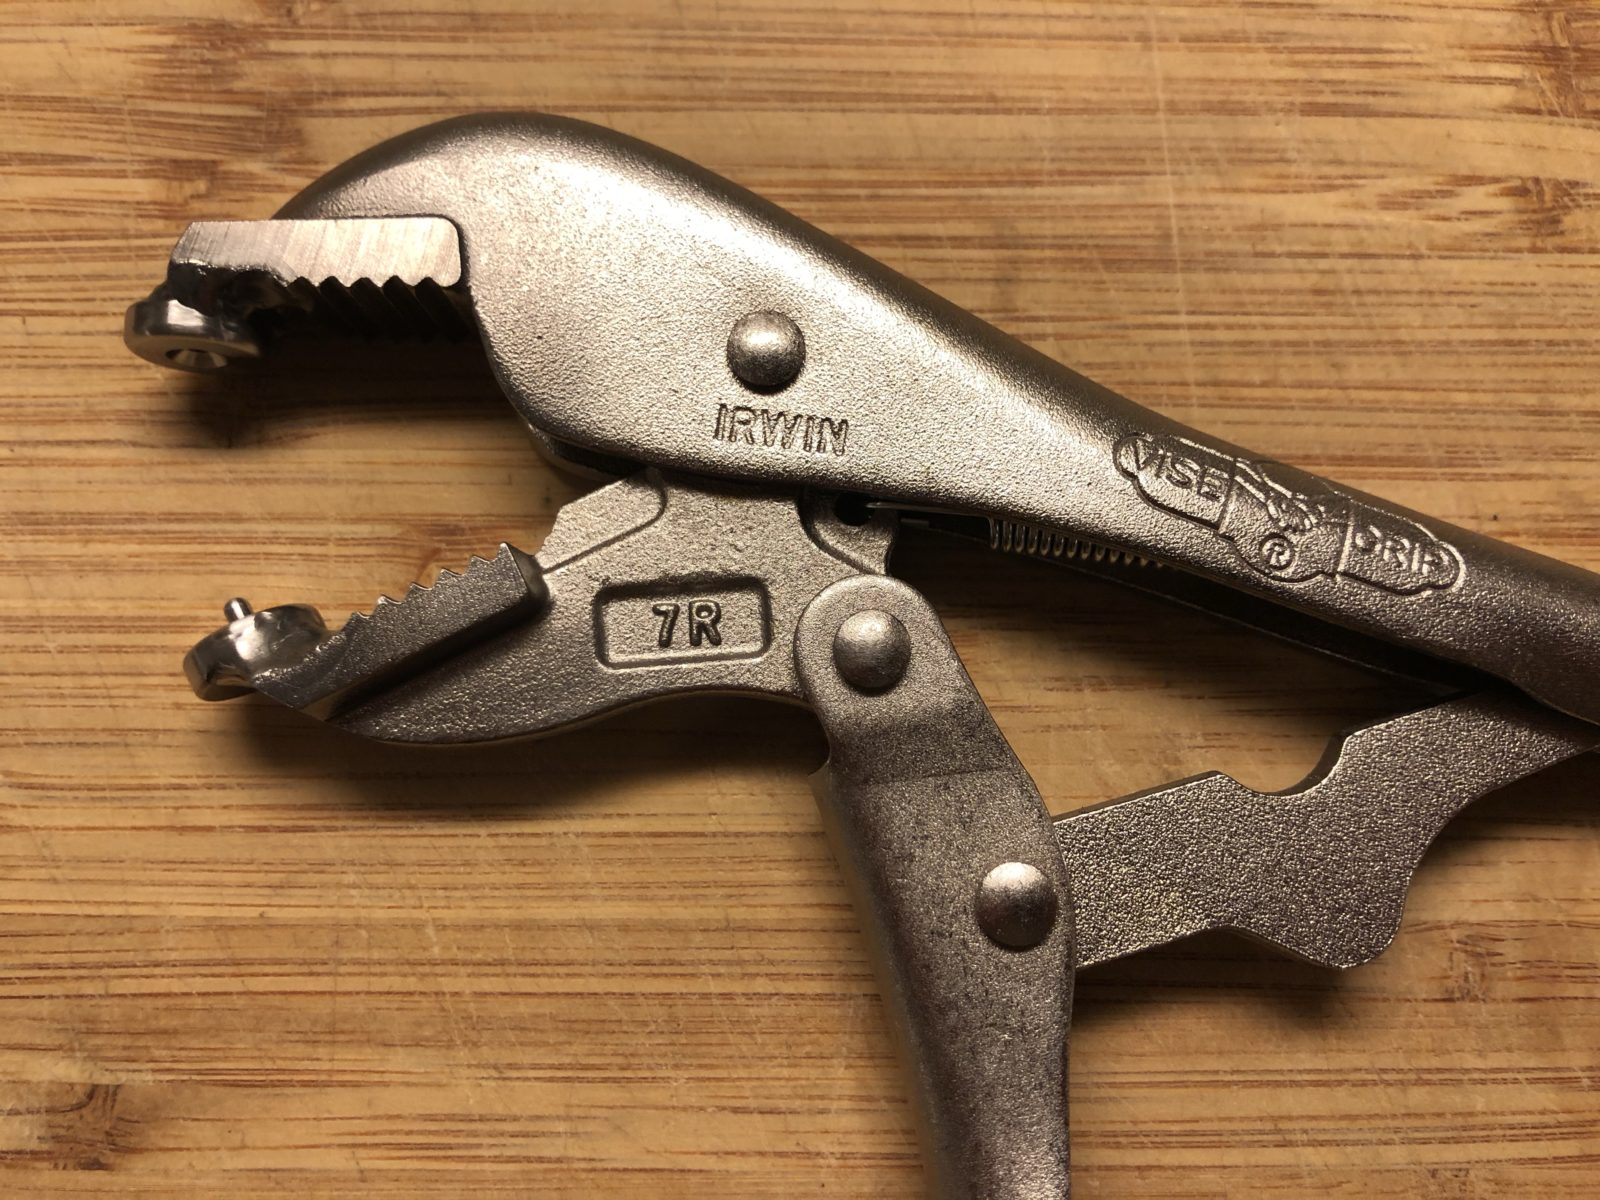
If the part that needs dimpling is too narrow for the squeezer, we have a super handy pair of vice grips that have dimple dies soldered on.
Dimple Vice!
And, if THAT doesn’t work, there is even a super-slender set of dies you use with a pop rivet gun! For the skins, and any area that is out of reach of the aforementioned tools, there is the c-frame dimpler, which has a 30″ reach. That’s what we’ll use for the skins.
Super Dimpler!
I call it the “Whack-a-mole.” 🙂
So, next up… finish dimpling the non-skin parts here at home, go dimple the skins at the hangar, then move on to the next step, which is deburring all the edges, crevices and other sharp bits on the parts!