Finally! FINALLY!!
We finally got to a point in the project where the next step was,
“Prime, if desired…”
I’ve been a bit apprehensive about spray painting. First off, I’ve never done it before. Secondly, I’m using a particularly toxic primer. These two sticking points perhaps contributed to the long wait. The weather hasn’t been helping out, either. Lately the daily high temperatures have dipped below 60, which is about the lowest temp you want to have for spraying AKZO.
I had several potential approaches to priming. First off, I was hoping to be able to prime at the hangar by building a small paint booth. I asked the airport manager about it and she was fairly sure it wasn’t a good idea (overspray, flammability, etc.)
The next two possibile solutions were to build a small paint booth at home, inside the garage. To that end, I invested in a 10″ “explosion proof” fan, and 25′ of duct, which I’ll use to vent the fumes and spray from inside the paint booth. I’ve watched a number of really decent project videos on YouTube on this, and I think I’ll invest the time and effort to do so.
However, time is of the essence! I need to order the wing kit soon so that we can move smoothly from the empennage into the wings without waiting too long. Currently it’s about a 14 week lead time.
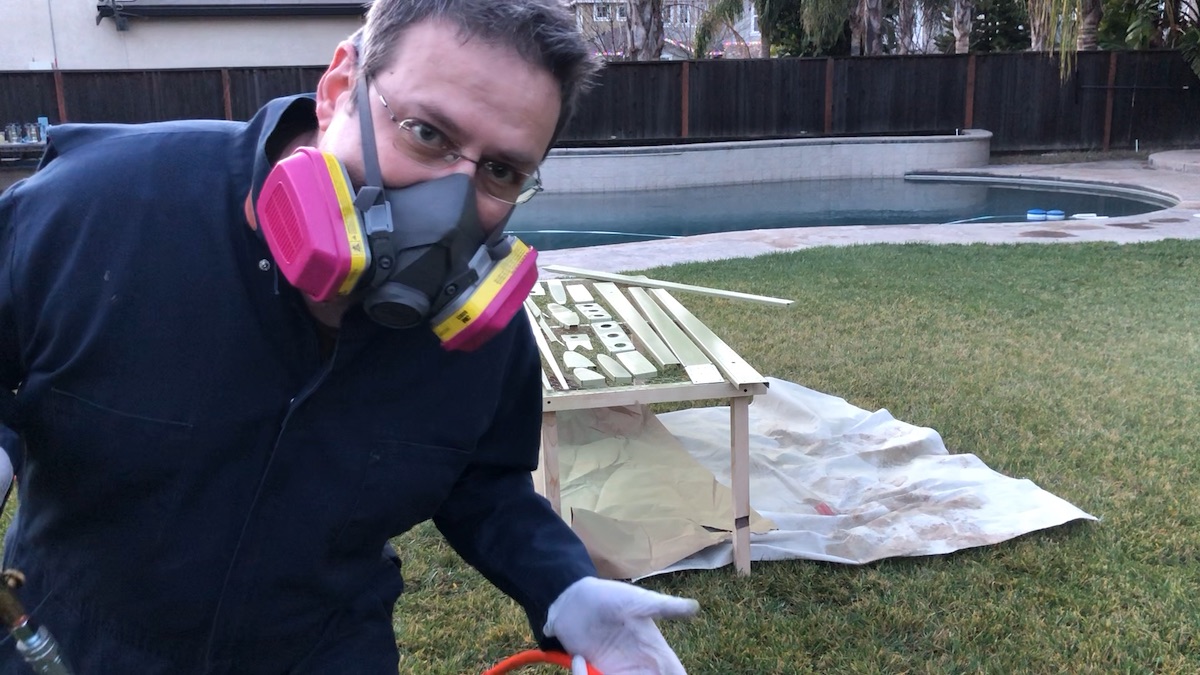
So, the last solution is to just spray these first parts outside in the backyard, where the overspray will quickly dry and float away without causing any damage. I assembled the parts and built a low table with chicken wire for a top, ordered the AKZO primer paint, a good 3M repirator, and all the other accoutrement required to do the job.
After several days of rain, today was forecast to be partly cloudy and 61°, which was right at the low point for spraying (although I’ve read that several have sprayed AKZO at 55 and even 45 degrees). So, I brought all the pieces-parts up from the hangar and started the process of preparing them

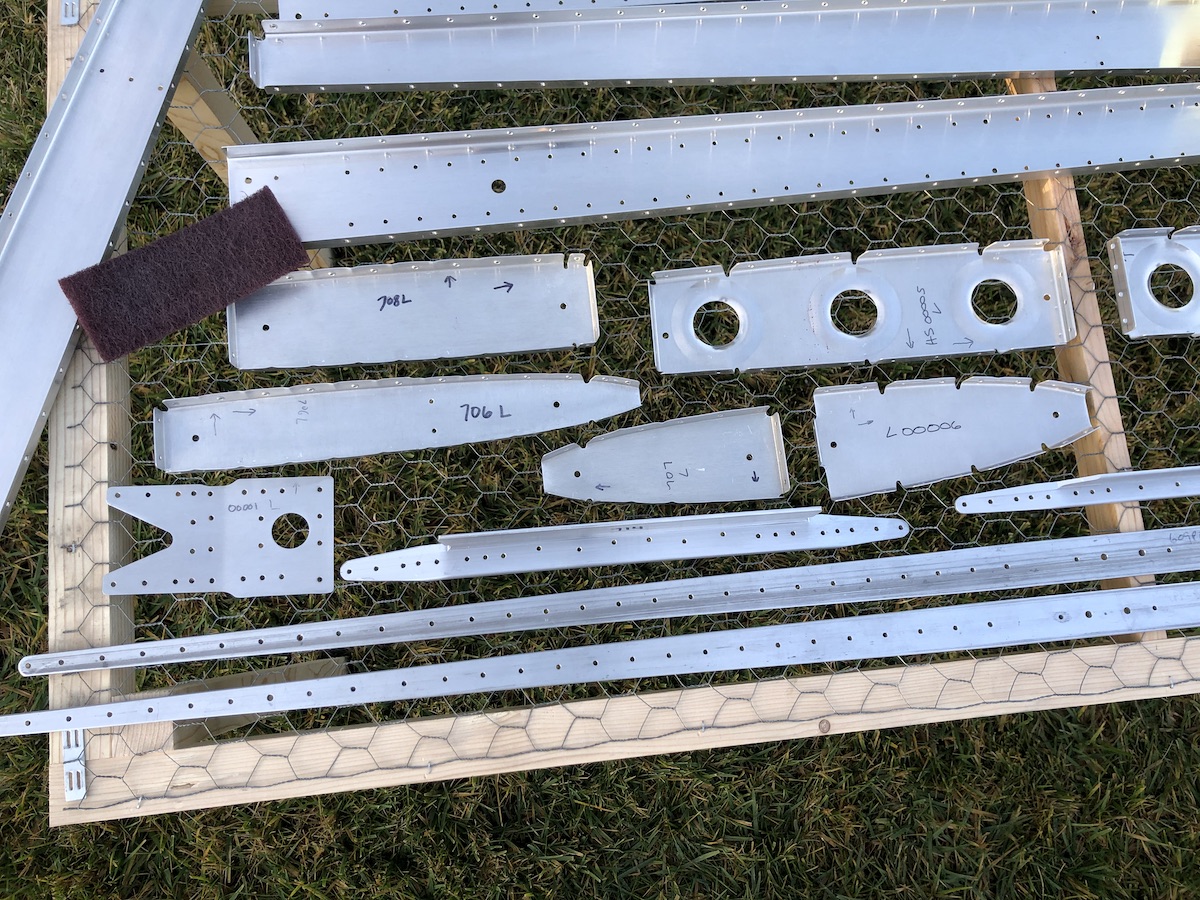
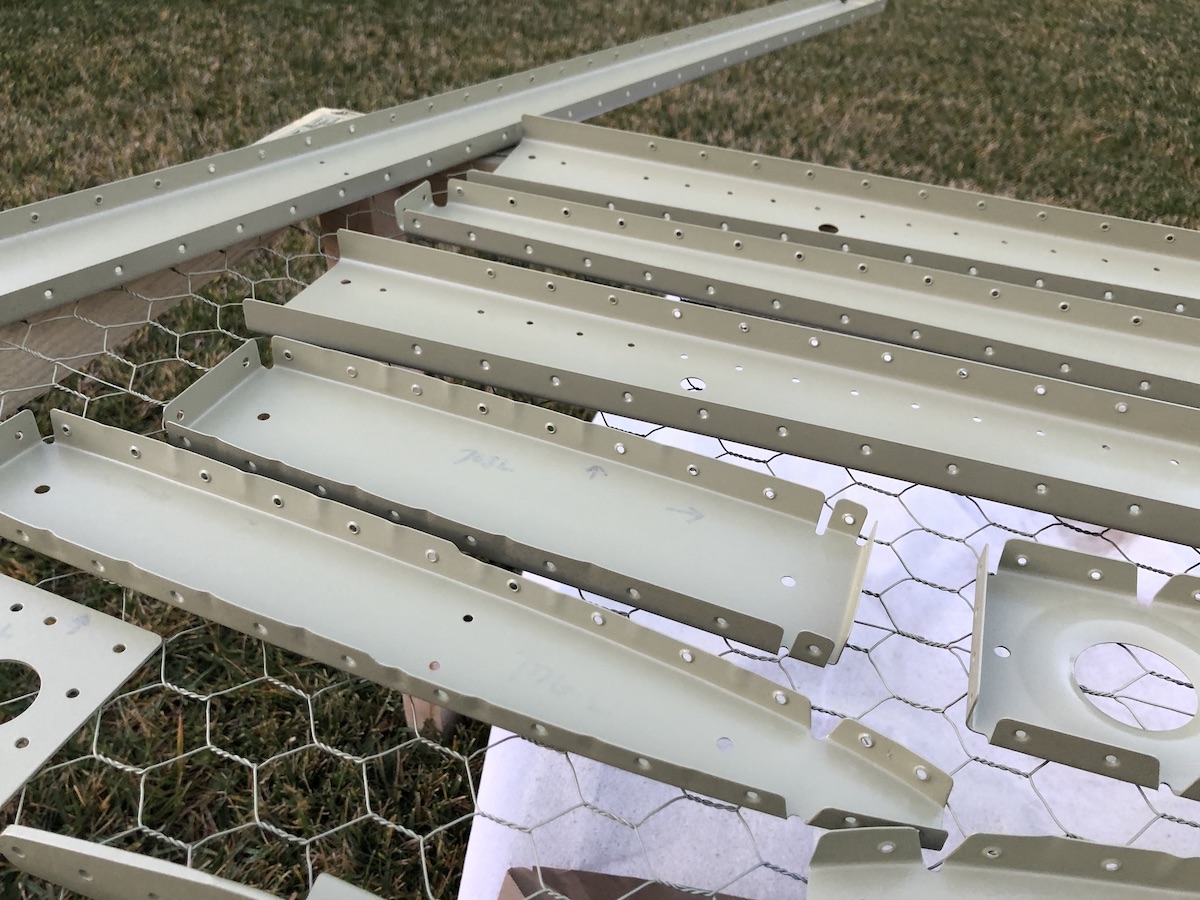
The first step is to scuff all the parts to remove the protective ALCLAD cladding in order to give the paint better adhesion. Next was to clean the surfaces from any oil/grease. I did this with denatured alcohol.
Next up was preparing the paint. Mixing the AKZO was interesting. As mentioned before, the paint came in gallon cans that were pretty bashed up when they arrived. Fearing a leak would start at some point, I went out and bought 2 empty gallon paint cans and set about transferring the paint.
The first can was the curing agent, which is a clear liquid with a slight yellow cast and a consistency of light syrup. I snapped on one of these paint can pour spouts and made the transfer easily. I then topped that can with a Rockler paint topper (with built-in paint mixer!).
The paint itself was a different story. The solids had settled and coalesced at the bottom of the original can. I started by first shaking the can a bit to mix it, but gently since the can was damaged. After pouring half of it I saw the solids had gelled at the bottom. THICK solids! I decided to pour back some of the liquid and try shaking some more, then stirring with a paint stick. Still, some of the goop was like silly putty! I finally got most all the goop reincorporated with the liquid and scraped the rest into the new can. After inserting the Rockler top I was able to stir it easily.
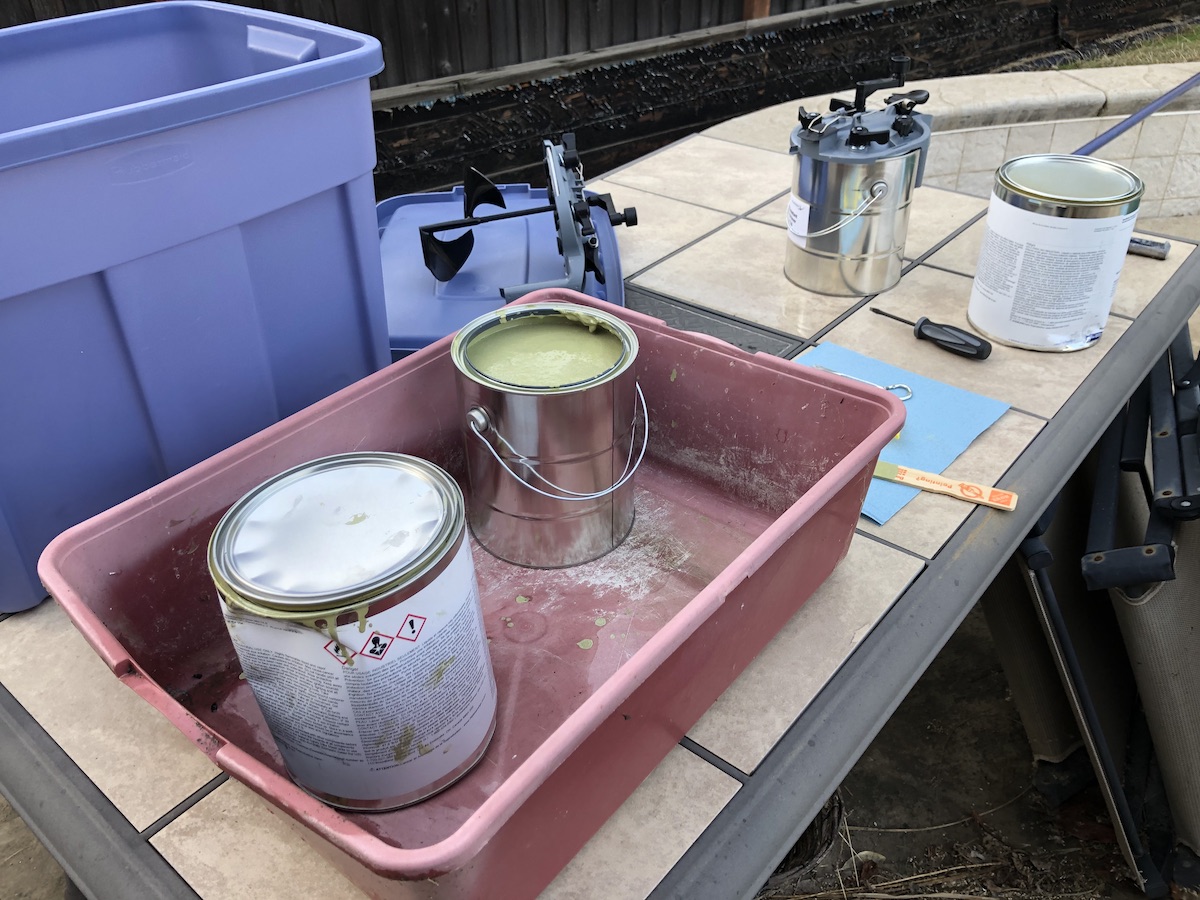
After transferring the paint to their new cans, I mixed the Component A (paint) for a couple minutes, then poured out equal parts of Comp A and B into a mixing cup and stirred it up good.
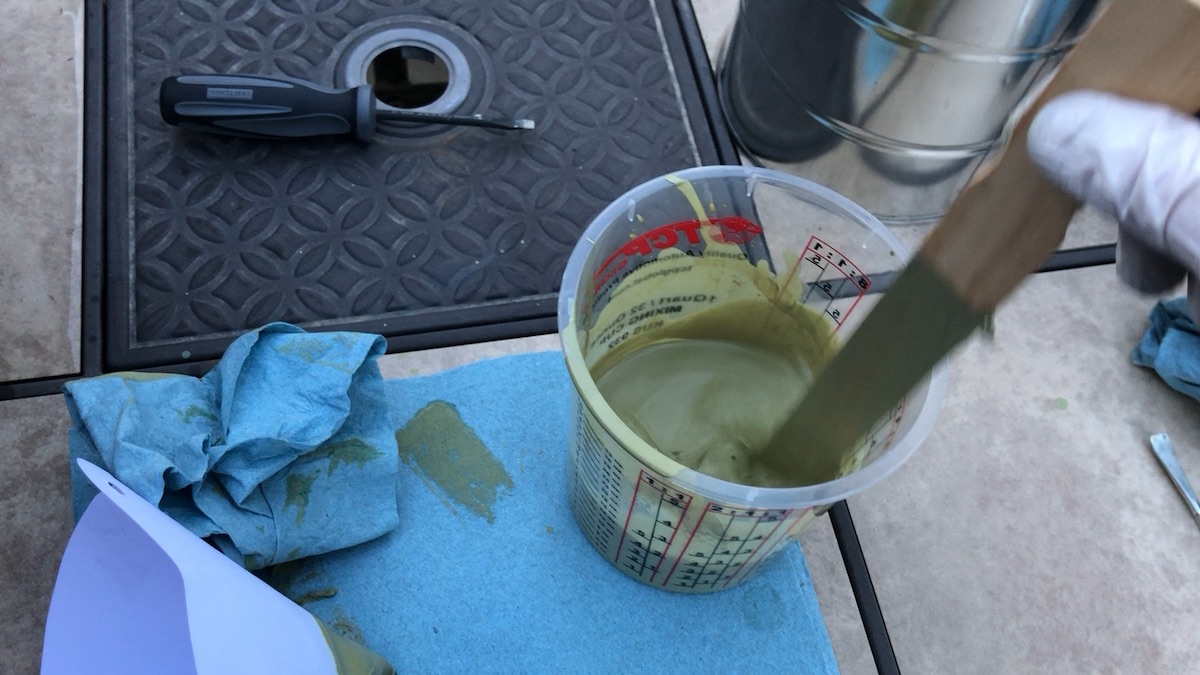
Next, the paint was pouted through a filter cone into the spray gun’s hopper, and off I went!
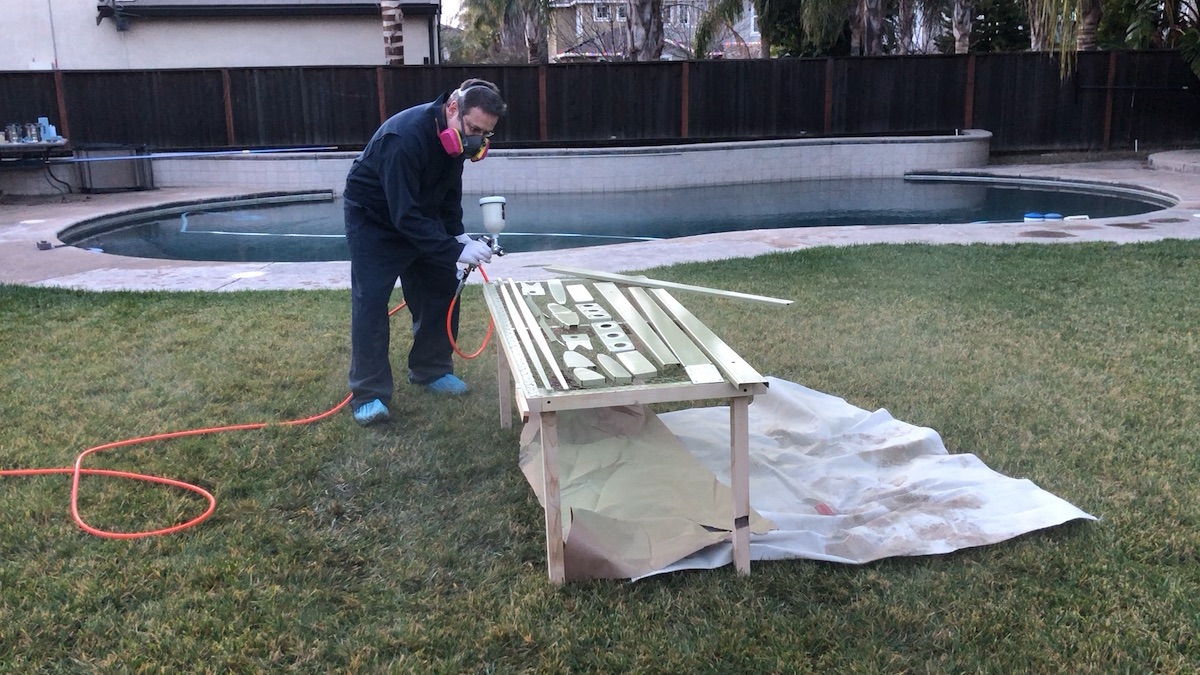
I mixed another hopper of paint while the first side dried to tack (15 minutes). Then I carefully flipped everything over and sprayed the second side. Both times I lucked out and mixed just enough to finish each side!
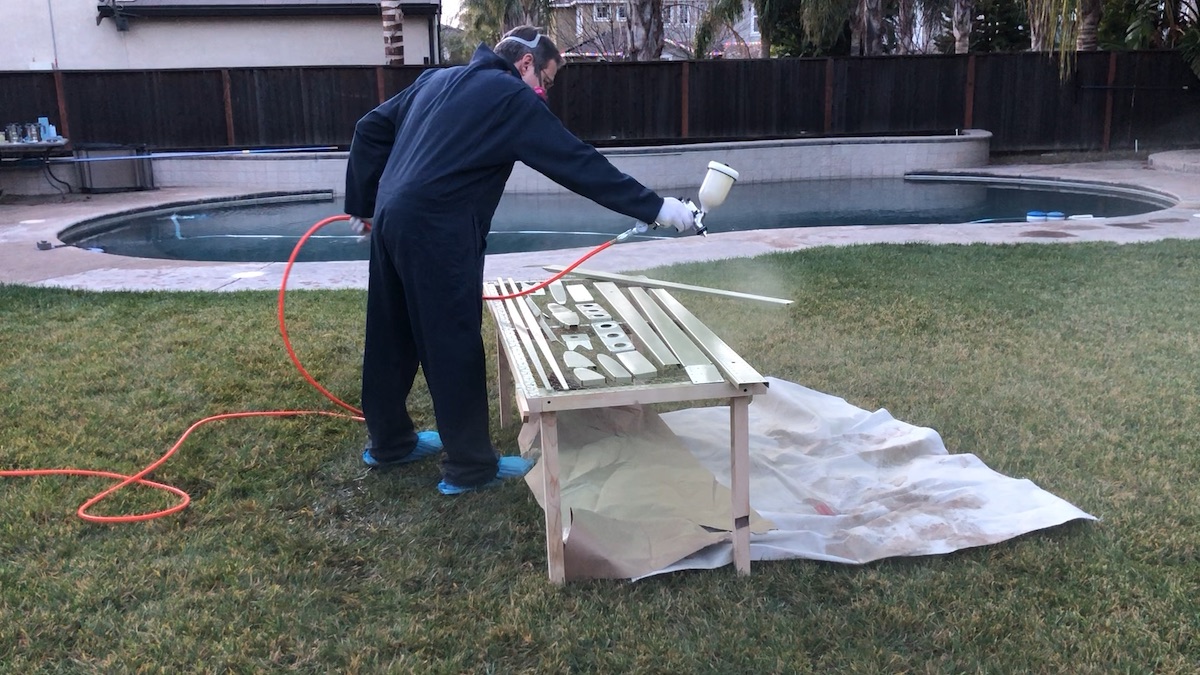
Overall, I’m happy with the results. I did forget a couple things while spraying, like giving the first batch of paint 30 minutes to be ready after mixing it. I also had a bit of trouble getting the proper fan pattern set, but after twiddling the knobs a bit it looked okay. I sprayed at 40psi, but probably could have turned the air down a bit more. Cleanup went okay, but I was pouring from a half-gallon can of solvent, and it got everywhere. There is a special solvent sprayer I need to pick up that makes it easier.
Unfortunately, I got started a bit late, as I had to run out to ACE hardware to pick up a connector for the spray gun to connect to the air hose. By the time I had finished spraying the second side, it was getting dark. I ended up cleaning up and bringing everything in well after sunset. All the parts were shuttled into the garage where they are currently drying.
So, I finally did it, and it wasn’t that bad. Tomorrow I spray the skins, then we can get back to work with riveting! Build on!