
Tonight the 1/8″ dimple die set arrived, and so we jumped right in and finished dimpling the outside edge of part 1 of the practice project. We tried dimpling a couple with the locking die pliers we bought, and then some with the C-frame dimpler.
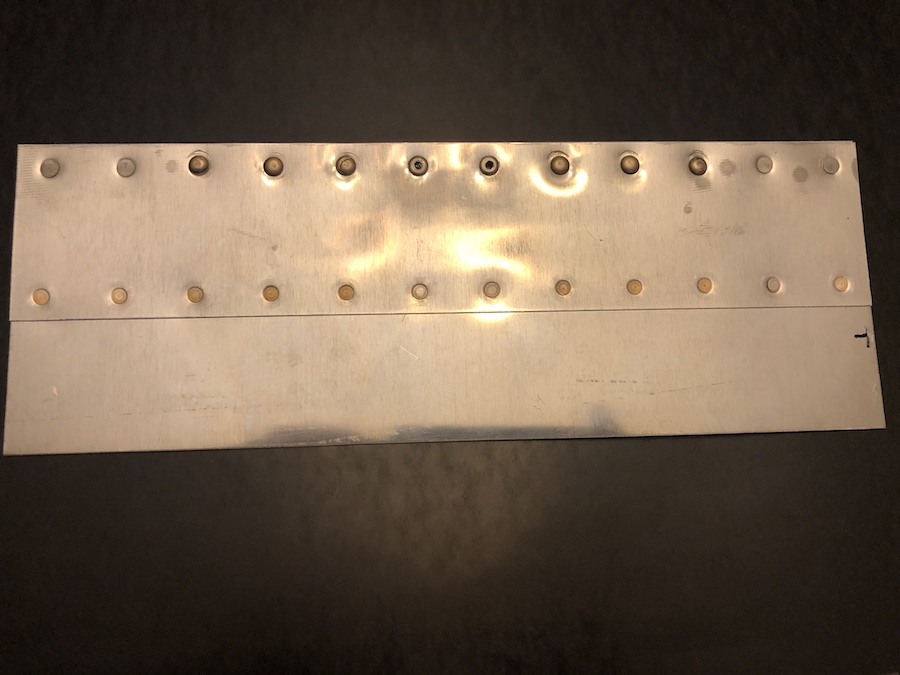
The first thing I noticed is that the dies that came with the pliers were definitely not as smooth as the 3/32″ spring backs I bought. After we dimpled the edge, I held it up and man…it looked like the surface of the moon, not the surface of a calm sea at night. You can see the difference, and it is very notceable. Oh well…not much you can be done at this point.
Moving on, I broke out the microstop countersink and tried to get it set to what we thought was a good depth. The wonky dimpling didn’t make it easy to see if we had countersunk deep enough to have the metal lay flat against the angle piece. Looking at it, it didn’t seem deep enough so we went a bit deeper and decided we’d better stop.
Now we starting preparing for riveting, and it’s here that I caught the first major “oops” that we made. When we tried to set the 1/8″ clecos, they would not “grab” at all! In fact, they fell out! Looks like we sunk too deep. :/
So, we had a conundrum to solve. There was no easy way to clamp the two pieces and still be able to rivet. I decided to rivet the 2 outside edges first, after squaring up the pieces. For this I thought it best to give our back rivet set a try. After setting the set into the gun, I discovered that there was not enough room for the set to sit on the shop end of the rivet! the plastic shroud around the back rivet set took up too much room!
Not being able to use that, I decided to switch to a straight mushroom set instead, since I could get that onto the shop end easily. I went ahead and used our new back plate, and stuck a 4-4 rivet in and proceeded to set it. So far, so good… looked like it set fine and even I managed to keep the rivet set on top of the rivet. Good! On to the opposite end! (this was mistake #3 or 4, at this point).
After setting the rivet on the other end, I noticed there was a bit of sag between the work pieces, and without clecos to hold everything in place, it would only get worse! Oh hell…might as well carry on.
The plans had us use 2 AN460AD4-4’s on each end, then 3 AN740AD4-4’s next to them, and then 2 pop rivets in the middle. I imagine that was just to give us a chance to try using different rivets. It was then that I saw that I should not have dimpled and countersunk for the universal OR pop rivets at all. Damn it! In fact, if I had given it some thought at first, and left them as they were, then at least the clecos would have fit fine and held the pieces together better.
Anyhow, long story short, we managed to get all the rivets in just fine, but that edge sure looks ugly!
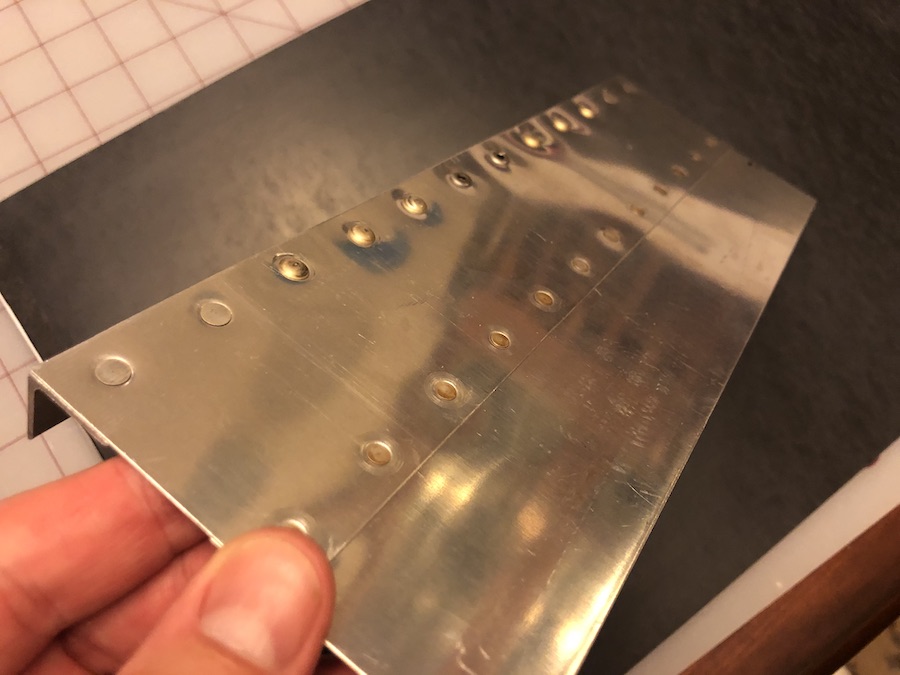
Ah well… the whole idea of doing these practice projects is to learn here before you start working on the real thing! What are our takeaways for tonight? Universal rivets don’t need countersinking/dimpling. Neither do the pop rivets (at least those that the kit called for). Secondly, countersinking needs to be done VERY CAREFULLY! I inadvertently enlarged the holes on the bottom of the angle bracket, and because of that, clecos didn’t grab, and we had to over-smoosh some of the rivets to make sure they grabbed.
Regardless, we had a lot of fun tonight finishing up the first part of the practice project! Now to order a pair of 1/8″ Spring Back dimple dies, and maybe another practice kit! The Van’s light box looks pretty cool!