Oh boy! Another cool project to tackle!
So I saw this one day while breezing through Youtube. There are a couple brave (insane?) souls out there who have taken it upon themselves to build a sim cockpit where each and every control actually works. Awesome! I absolutely must give this a try!
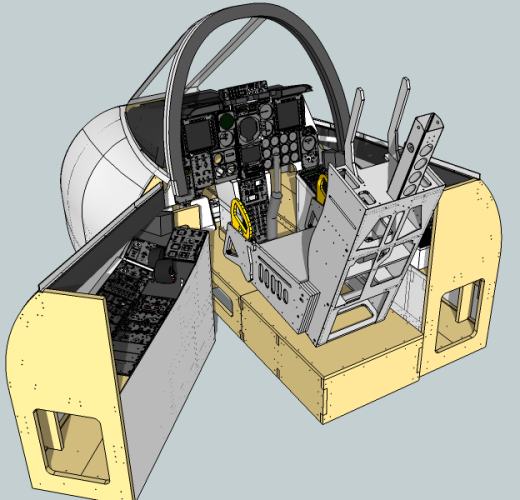
I bought the set of plans for the above simpit. It can be cut out from several 4×8′ panels and assembled to produce the full physical cockpit. But, that’s only the beginning! The A-10C has at least 23 panels: radios, control assemblies, computers, gear handle, to name a few.
Most of the construction calls for milling the panels from acrylic. Three layers of acrylic, to be exact, in order to allow for backlighting. Also, a variety of knobs are used…and not like any you can buy at Home Depot! They need to either be actual A-10 knobs, or a realistic facsimile.
Since I have both a laser cutter for acrylic, and a 3D printer, I’m halfway home!
The other part is wiring switches and LEDs up to controllers which will be recognized by the flight simulator (DCS, in this case) so that twisting the actual knob is detected and actioned on by the sim.
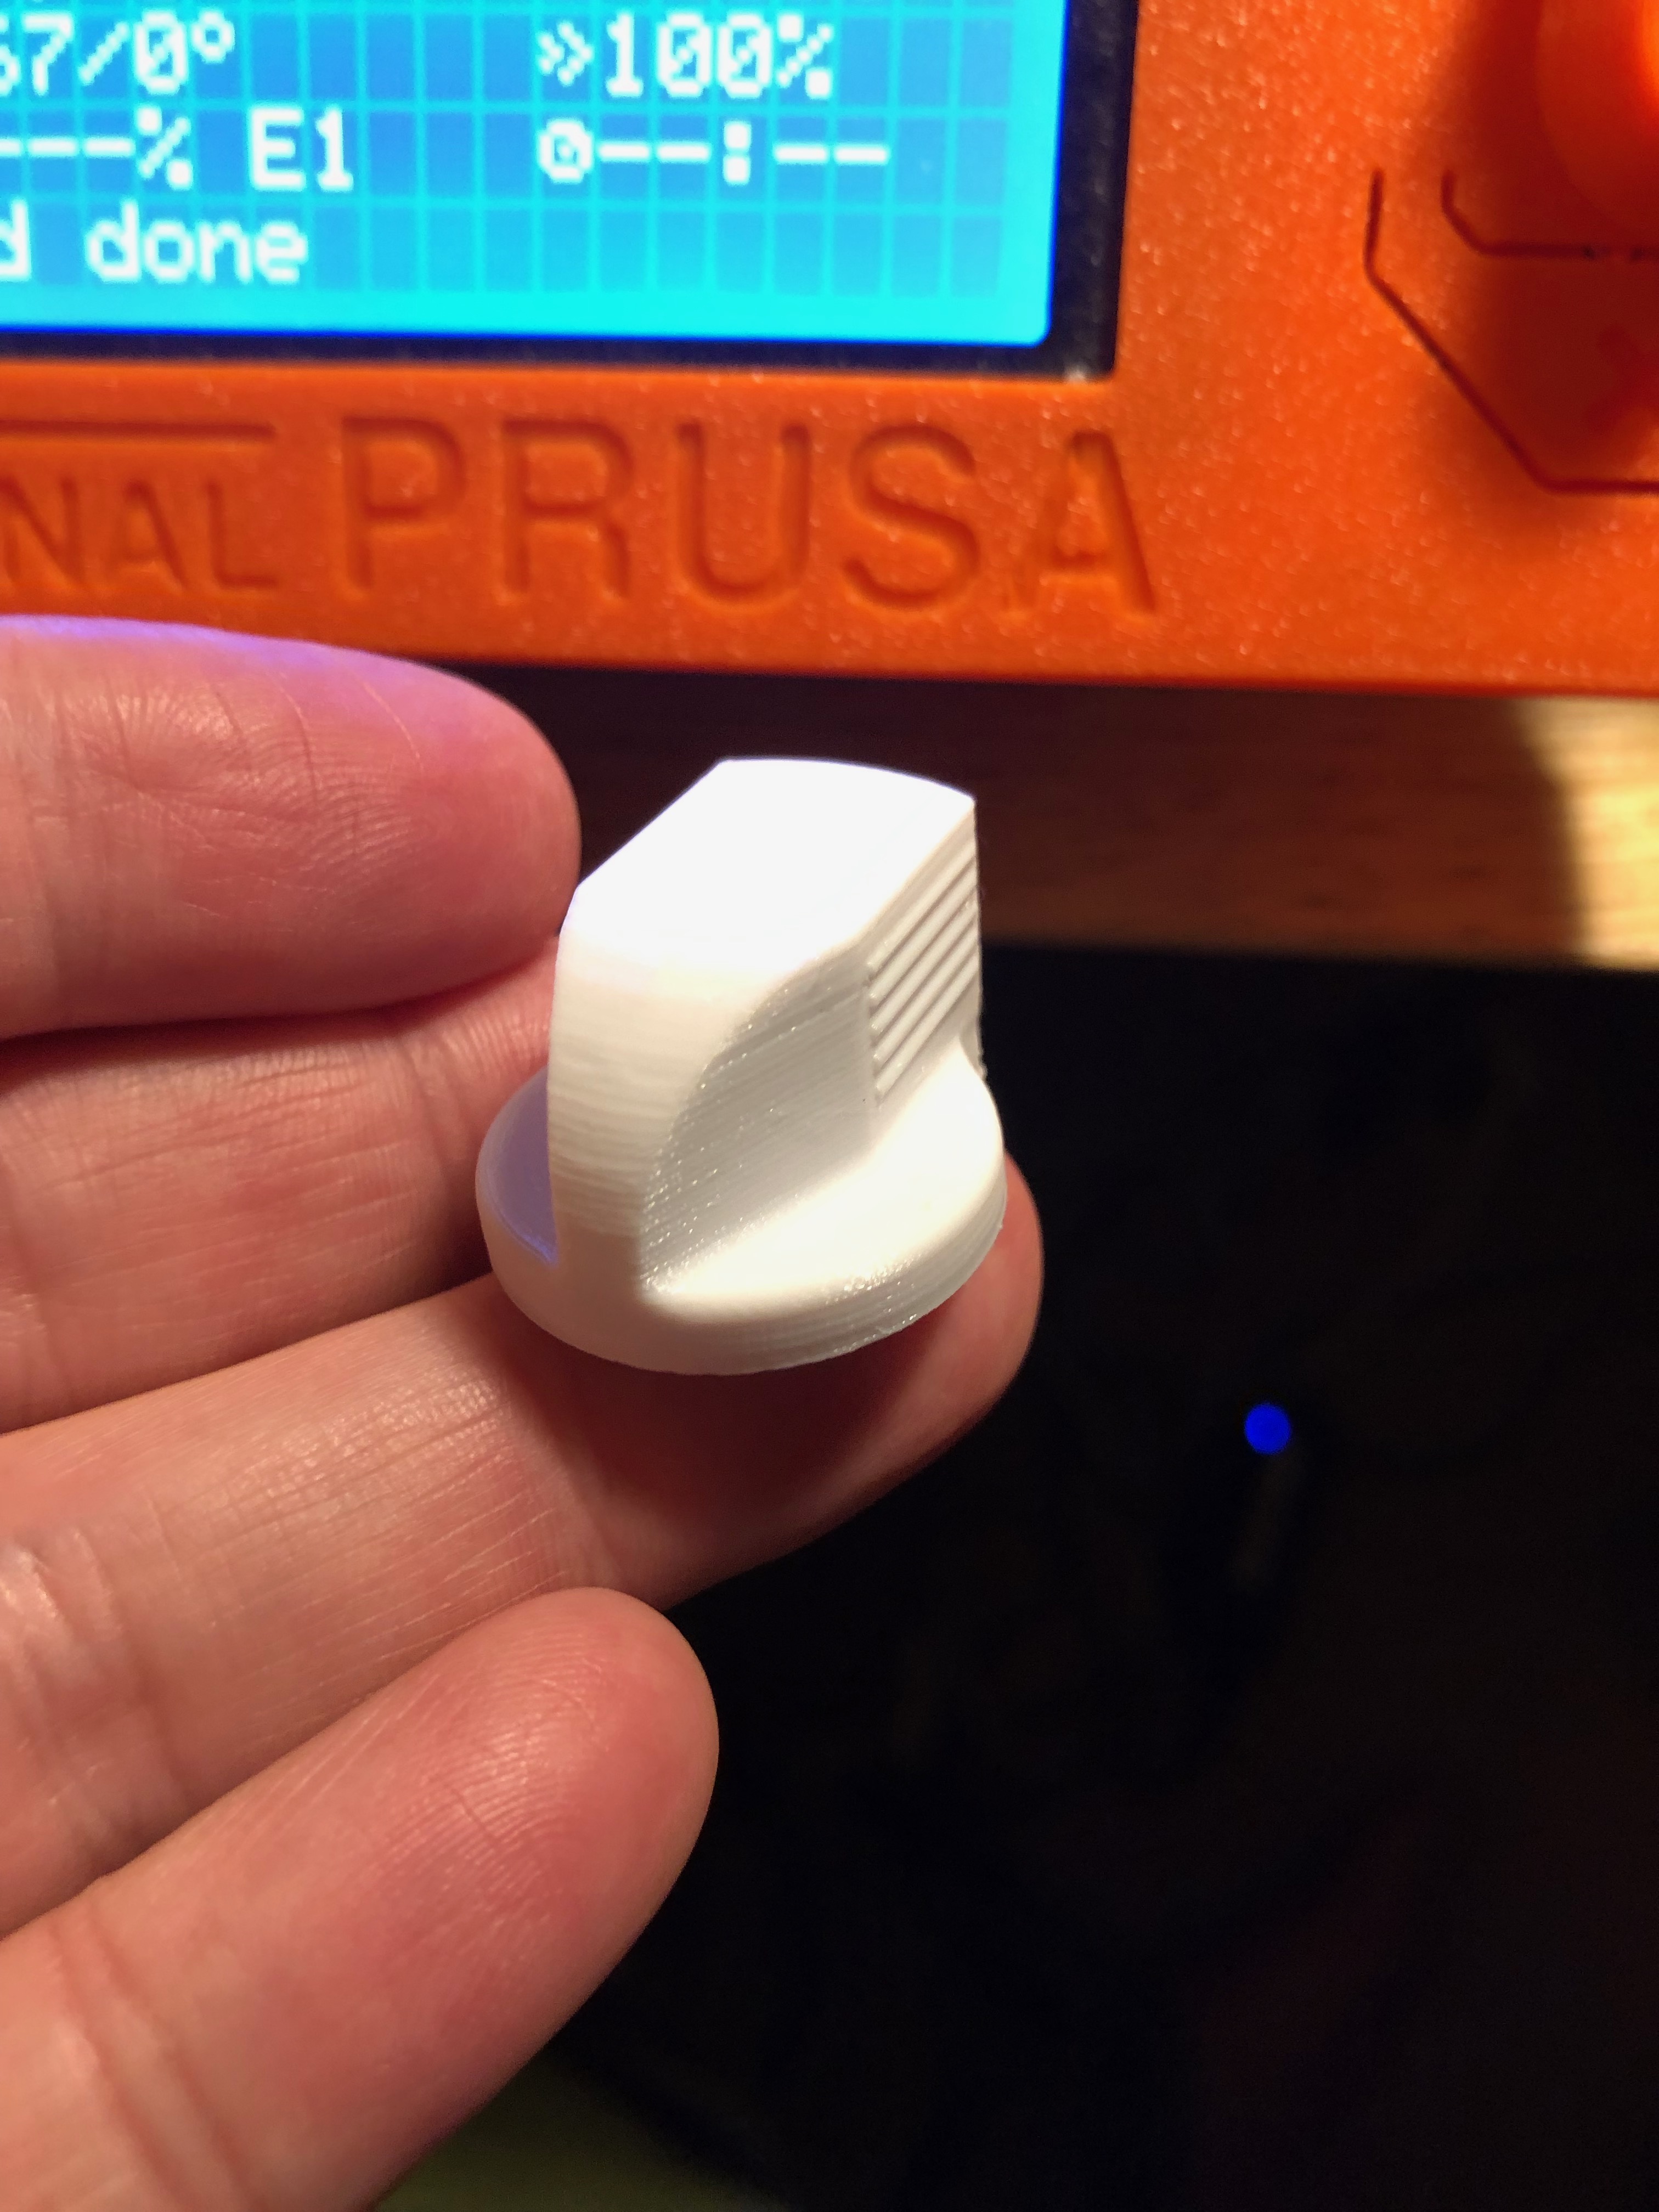
So, I’ve started reading and reviewing videos, because, I’m going to do this! Looks like a long journey, but I can do it 1 panel at a time. 🙂 I’ve found laser-ready plans for each panel, and am reading the Eagle Dynamics forums for ideas. I’ve even printed a couple test knobs and they’ve come out excellently:
So, I’ve decided to try the landing gear panel first. It’s challenging because I have to fabricate the actual switch, which consists of a slightly-bent 12mm aluminum tube which needs a definite THUNK action to it. One guy used a shock from an RC car, and it looks and sounds great, so I think I’ll mimic that.
Anyhow, this is a big project. More to come.