
I run a small bunch of sites from my home server, and one of the tasks I’d undertaken was to provide a Mailman-type list for one of my groups. I run OS X Server, which I really do like. However, in the past iterations it wasn’t entirely clear just how mailing lists played into the admin suite. What I ended up doing was installing Gnu Mailman and trying to wedge it into the server’s configs.
Not the best idea.
Although it worked initially, upkeep was a pain as I had to be careful not to get in Server.app’s way when it updates the varied config files through the system. I also decided to use the postfix files found in the default unix-y location of /etc/postfix. Since Server.app uses /Library/Server/Mail for it’s config and data, the whole setup ended up a delicate balancing act which ultimately proved to be too tedious.
I decided to update the server to Yosemite after it had a chance to “burn in” for a while. I figured I’d take a “wait and see” approach to how mailing lists would fare after the upgrade. What I really preferred was to let Server.app take control of my lists so I wouldn’t have to suffer through another bout with Mailman (which by itself is wonderful).
After updating, I took the time to review everything in Server.app looking for if and how it had deployed mail list support. As it turned out, I found that there was (and probably has been in the past) a ridiculously simple and elegant list solution built right into Groups!
I’m not kidding about ‘simple’ either. OS X’s email lists don’t have the rich features of Mailman, like remote administration, list archiving, summary mail or by-user list preferences. However if your main use case is to quickly disseminate info to a group of people, then it fills the bill quite nicely, and even pops in a Mailman-style list title to the subject line.
My list requirements
Some of the lists I was interested in setting up included:
- A Mailman-type distribution list for a local organization
- A couple email alias distributions for my wife and I
- All the typical hosting email aliases for all my domains (hostmaster, info, abuse, etc).
First off, a couple assumptions. I’m assuming that you have OS X Yosemite installed and configured with at least one domain that you will be using for your email lists.
Setting up your users
I started with the group’s mail lists. There were two lists I wanted to create: an all-members list and a list just for the board members. The first step is to add in the users.
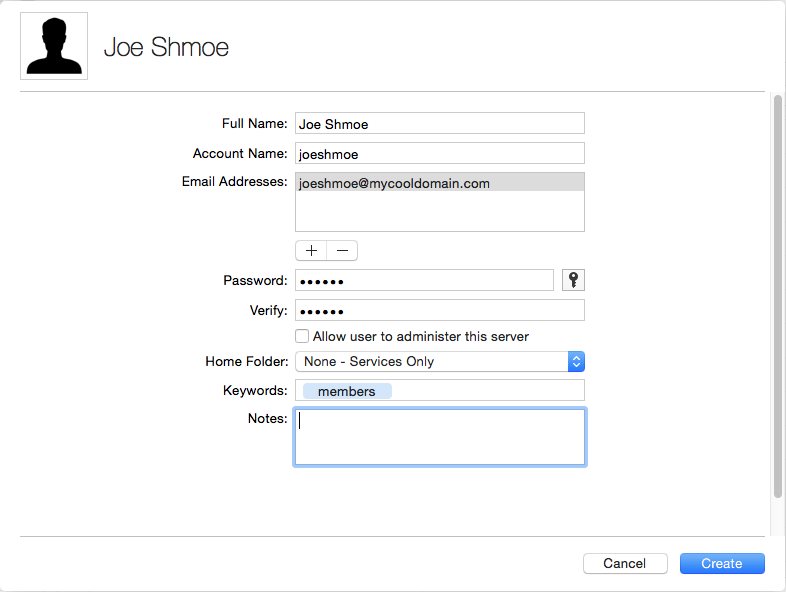
Adding in a user through Server.app’s User panel
Note that I’m not giving Joe Shmoe a home folder since he’s just a list member. This way, Joe won’t be able to log in to the server at all, which is what I want. You could assign him a home folder if you’re extending those capabilities to your list users.
Next, decide if this user will log into your mail server for their mail, or if you’ll forward any mail to the list to an outside email address. If you’re interested in the former, you’re good. To set up a forwarding email address to an external email (makes it easier for some users to just check their Gmail account, for example), then right-click the user from the User list and select “Edit Mail Options…”
For local delivery, leave the options set as they are by default. To forward any list mail to their external account, just select “Mail should be forwarded…” and enter their email address!
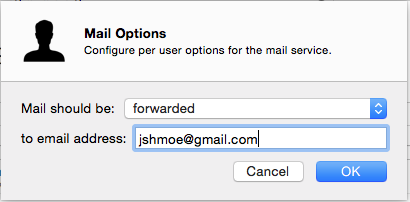
Forwarding email to an external address
Bam! Add the rest of your users and we’ll move on to sertting up the group.
Setting up the group
An email list in Yosemite is nothing more than an email address attached to a group of people. Pure and simple. So all we need to do is set up a group, add all the users and put in a group email address.
From the Groups panel, click the plus sign at the bottom to add a new group.
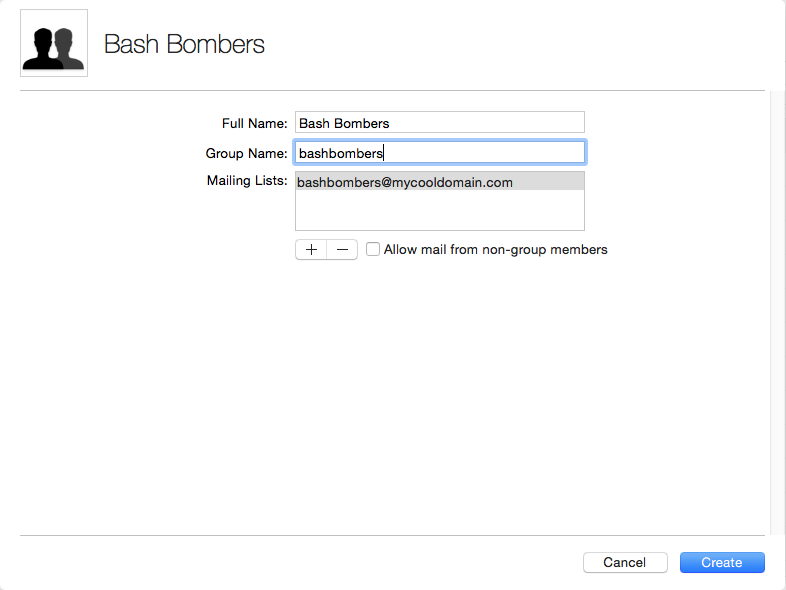
Adding the group
Add a user-friendly group name, for you as the admin to identify easily. Setting the group name sets up the initial email address for the group. You can change this now or later. I just accept the defaults to start with. After the group is created, double click it to open up it’s editor.
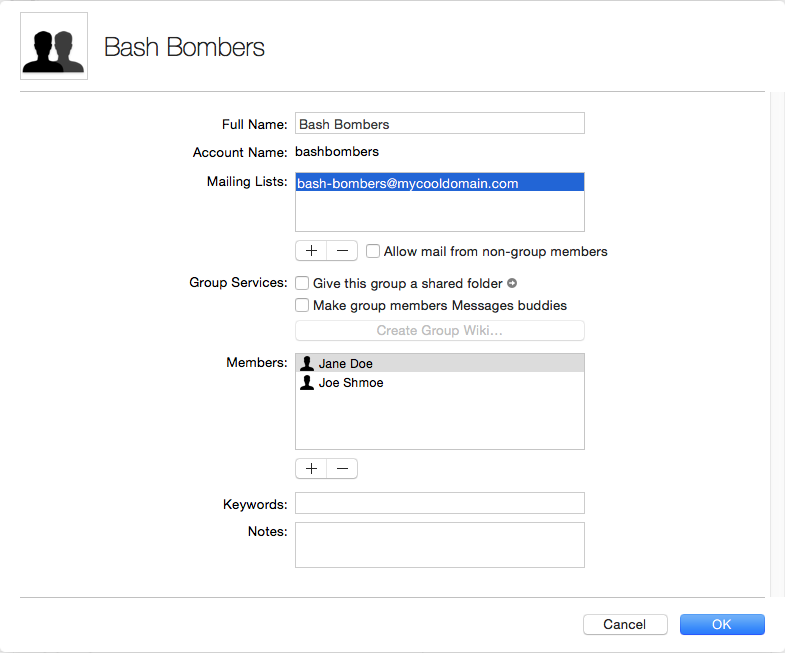
The group editor
Now that the group is created, we can add users and set up the rest of the options! Adding members is easy. Just click the + under the Members section and enter part of the name. Server.app fills in the rest. Now notice the Mailing Lists section. This is where we enter all the email addresses we want to associate to this group. As you can see, I’ve changed is slightly to include a dash for readability. You can add any number of aliases here, and any mail to them will be distributed to the members in the Members list. Voila! Easy-peasy!
Important note: If you want people outside the group to be able to mail the group, you need to check the “Allow mail from non group members” checkbox!
That’s it! Server.app will amend the virtual_domain and virtual_users files for postfix and set up all the required routing. In our example here, sending an email to “bash-bombers@mycooldomain.com” will result in postfix relaying a copy to Joe and Jane’s respective email addresses, either local or external.
Summary
Setting up basic mail lists in OS X Yosemite is really quite easy, and although there aren’t a lot of features, it’s quick and intuitive to set up lists and assign email addresses to them.
I hope this little guide was helpful!
#mikec